Featured post

280CE left hand side rust repair

For the last few weeks i have been making and welding into place the required repairs on this 280CE,but most of the work has been concentrated on the Right side front floor and sill structure.

This the right side 1/4 panel > it was so full of rust and bad repair work I felt it was necessary to to cut it right out to get rid of the corrosion.
This is the veiw of the bottom of the 1/4 panel before I cut it off. the bondo can be seen where it oozed through the rust hole. holes.
Part of the problem is the old sponge shoved into the panel to stop leaks .
The body filler is 5 mm thick. But in other places it’s even hicker and rust is pushing it off.
The tape was going to be a pattern to make a new piece but the circle in the body filler dust above it is a massive dent in the side which was filled instead of straightened out . The ‘B’ Pillar was bent inwards ,with the lower part of the Pillar rusted away completely . This pillar will have to be removed .
This is the top of the rear part of the sill/rocker remains .The zinc coated part is the flange where the new rocker attaches.
The New Part is tried in place to determine fit .
Welded into place ,the car is lot stiffer on this side now ,so the temp.Brace is removed.

As more rust has been uncovered ,the rockers have to be fixed before any more rust removal can be addressed,once again to prevent the car collapsing.

This is the bottom of the left hand Front guard /fender.

Inside it is the usual story,lots of foreign ‘stuff’ used to hold things together .Fortunately there isn’t much rust in the rest of the panel.

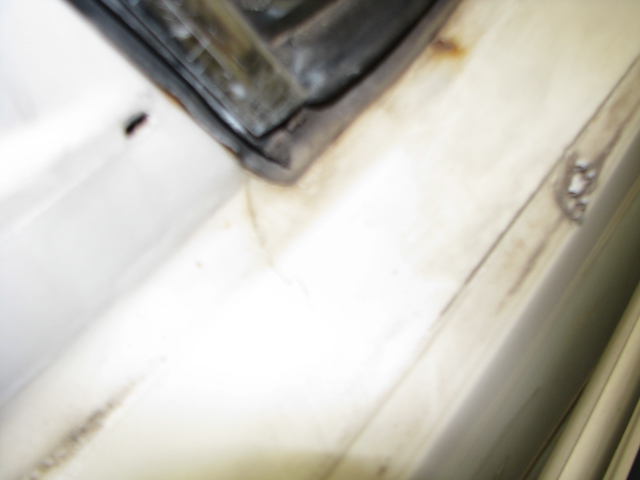
This is the top of the left front guard,below the windshield. The old seal was ‘painted’ with some sort of silicone which has made things worse,as water can easily get through the gaps.
The left door has to come off so the A pillar could be aligned properly and make room.

I found one reason why the car didn’t run very well . the two Lines in the pic,the white and Black ones,are vacuum lines for the central locking. the engine was sucking a lot of air at idle throwing the engine tune right out. An electric central locking had been fitted.

Top of left door,rusted around the Hinge mount,the two bolts and for the hinge.
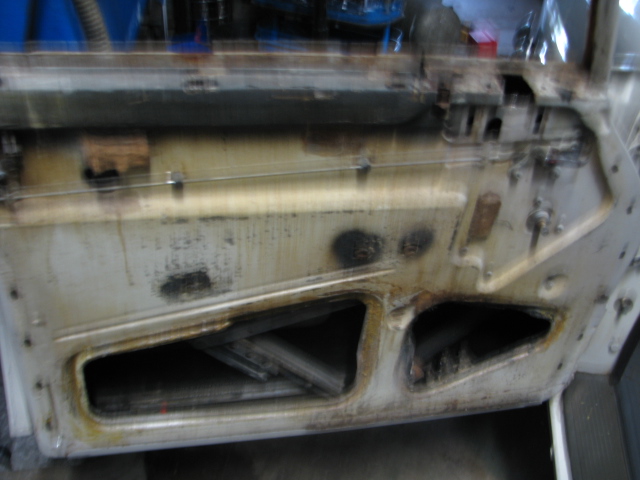
Bottom of the front corner of the left door. Water getting in the top hole has rusted a hole in the bottom . Again fortunately the door skin is OK.
Inside I found another horror.

The Seat mount was held in place with a pair of roofing screws and two pieces of rubber which had been glued to the floor. One of the screws had missed and most of the floor and inner sill section was gone completely.

I picked the “seat mount” off very easily .

Most of the floor here was rusted away and once all the various substances stuck on it to prevent feet falling through were removed it became clear where the rust began and could be trimmed up.

Most of this had to be removed ,The ‘seat mount’ can be seen on the lower left.
Here,the new inner Sill structure has been made and welded into place .The B Pillar needs to be repaired next.
The left front floor is repaired now .
So next job under the car will invlove removing the rear axle.

The rust in the low middle of the picture runs right across the car ,so the only option is to remove the diff so it can be reached easily.

Because there is insufficient places to support the car while the back end is removed,I have it sitting up on blocks of wood.

22/11/2021.

More rust uncovered….

Rear window aperture has rusted badly with the trim Clips rusted away completely .

Further to this ,the boot seal was removed and the lower edge was rusted completely under some poorly applied filler.

Trim clip missing….
Lower edge rusted out.
Lower boot edge with a piece of the filler which had fallen off.
I’ve never seen a W114 rusted out here but there is always a First.
Here the lead covering the roof join is removed to allow access to the welded joint.
With the boot lid removed the body jig,to ensure correct alignment is fitted
Next step,remove the 1/4 panel

The spot welds holding the panel on are drilled out then the skin is removed. The Lower section (on the right of the picture was rusted and covered in filler to disguise the damage. The holwe is for the forward bumper bolt.

Center of the wheel opening on the inside of the 1/4 panel

Here ,besides lot of rust holes and attempts to disguise it with filler is a large dent ,the dark area. The filler is very thick here.

Rusted Rear of right hand wheel house at the rear
Front curve of wheel house with remnants of wheel arch .

This is mostly Filler

Front bottom corner
Another veiw of the remains of the wheel house
The inner frame of the Safety cell construction can be seen here.
A mouse nest in the Air vent….!
A view from the rear.
A start of removing the rusted inner sections.
More cleaning reveals more rust .
Test fit of new panel .
Making a 3D pattern to determine the shapes in the required part.
Featured post

1954 Mercedes Benz M189 Engine repairs

IMG_0111

Some time ago I rebuilt this engine but during the running in process it had a rattle, which would only come at a particular rev range ,but was otherwise smooth. Once the sump was off ,the bottom of the oil pan was inspected and odd tiny peices of metal which looked like bearing metal . The rod caps were removed and the bearing,although not completely destroyed are scuffed really badly.  Why? 

IMG_0112

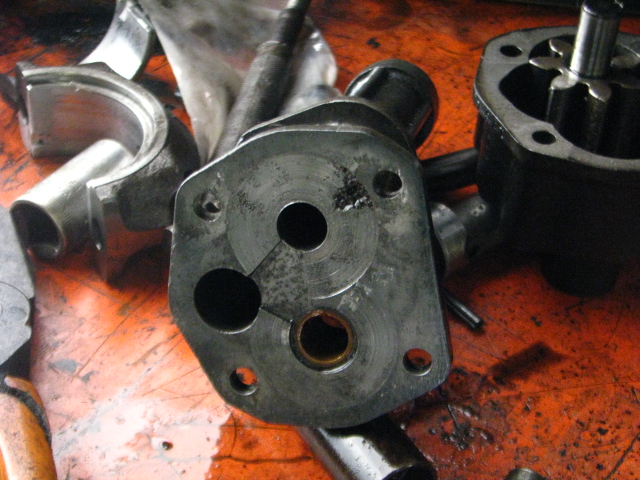
My initial thoughts were to pull the oil pump off as this is an obvious oil supply problem .Although the pump was inspected atc when the engine was rebuilt I decided to strip it right down and two things popped right out . First, the round wear mark in the pump shaft housing . and that square hole . It’s actually a fault in the pump housing as far as i can figure .It would appear that this hole has allowed the oil ,once hot to lose a fair amount of the pump vacuum as it sucks the oil up from the sump . So,once the car got up to temperature and at highway speeds the oil volume would fall away although the gauge would still be indicating full pressure at engine speeds above idle speed. 

Next step will be to replace the oil pump and bearings and inspect the oil pressure relief valve ,then reassemble the engine and install it back into the car.


Featured post

220SE Restoration .

IMG_0067

This is an early 220SE which has been sent in from overseas for a complete make over. .All of the bright trim is being removed followed by a strip back to bare metal .IMG_0072

Unfortunately some repairs in the past were not very well done and will need to be made right to remove rust which is just starting under the body filler.

Here, the front mudguards have been welded to the sill/rocker sections. These are unibody car and they flex a lot which cracks any joins which should not be welded up.

IMG_0077

Not a very clear picture but this is the Drivers side.

IMG_0082

This the rear end of the Sill section at the drivers side rear door. The seams have been filled,again this must be rectified.

IMG_0087

Passenger is side is the same with much work required to fix. As can be seen in both pictures, both jacking points are missing … 😦

IMG_0073

This the Seam at the top of the rear quarter which again has been badly filled and is cracking with rust showing through the paint .

IMG_0086

The bottoms of the doors are showing signs of rust where the door rubbers seat , this will have to cleaned out and treated to prevent further rust.

IMG_0084

Inside the door groove there is a little rust which has just been caught in turn.

IMG_0071

In the past the doors have been sprayed inside  with bituminous under coat, which unfortunately never works .This will be removed and a proper rust sealer applied.

IMG_0076

This is the drivers side 1/4 light frame which unfortunately is rusted away so the hunt begins for a new or better one.


Featured post

Mercedes Benz 280SE 3.5 ute Engine swap.

The new engine and trans are installed with a new oil pan ,rear and front crank seals. New injectors with new intake manifold gaskets,timing chain and rails should see a nice reliable tow car for the owner 🙂 .New fuel hoses and clamps will connect the fuel system together .

280CE rebuild

It’s been some time since I posted anything up for this car, so here is an Update of all the effort so far.

This was the bootlid once the paint was taken off to check the extent of the rust damage.The white marks are holes which were filled with bondo.

The skin of the bootlid was removed and underneath it was beyond repair.

This is the frame for the boot lid which was still repairable.

Here,an attempt is made to make a new skin with the curved part from the old one to get the correct shape.

The skin welded together .

The welding took quite some time.

The Body work was mostly completed by this stage and several coats of black epoxy primer were applied. This seals the metal work to prevent rust,Next several coats of white epoxy were applied over this.

Prior to the black epoxy coats several layers of white epoxy were applied to help get the panel surface into better condition .

Here,more coats of white epoxy are applied to further finnesse the surface using finer and finer grades of sandpaper.

Once the sanndpapaer using 400 grit was used to make sure the surface was a flat as possible,the first coats of Proton rain forest green Base coat were applied.

Normally this is followed by three coats of clear but a few strange paint reactions occurred which took several weeks to rectify.

This was before the paint rectification marathon.

….And this is after ,thats the light reflecting into the paint.

From another angle to demonstrate how the lights affect the colour reflection.

Inside the boot ,which is a bit dusty ,is the 1st layer of heavy sound deadening material .

while the paint is curing I took the time to overhaul the steering column,replace the worn out coupler and so on.

The steering wheel ws full of cracks and wasn’t road worthy,so I repaired the wheel and got the surface colour matched to the original,which looks lighter in the flash than it is in normal light.

Another important job to be done first was to check the heater blower fan and air con fan motor checked. These hae to be checked because once the dash is back in they can’t be accessed. Here the air con case is very much worse for wear where someone had smashed the hosuing to try and remove the fan. I fixed this by making a dam inside the case with plastercine ,then using fibreglas matt ,I made a new mount for the fan. And I replaced a lot of the missing clips which hold the case together .The seams are supposed to be sealed with duck tape to prevent cold air escaping or warm air getting sucked into the evaporator.

I fitted the front and rear bumpers and the headlight buckets are sealed with wax .The tail lights were replaced with better ones .

This is the under dash situation as i check every wire to make sure it’s all working properly before the dash is refitted. The demister/heater flaps all have new foam gaskets so they close off properly. The repaired fan motor mount is on the bottom right of the picture.

Here is the 1st layer of sound deadning in the passenger compartment. It’s also in the roof .

280CE W114 Rust repairs continuation.

The car has been stripped to the bare metal to remove all old paint ,which has revealed a lot of dents and a few more rust holes.

Here the panels looked OK but were in very poor condition.

Here,the left front guard has the filler removed to expose a massive dent,Rust and general damage which is uneconomic to try and repair.

Another Door was sourced which is reasonable condition. While not perfect it is a better basis .

The Boot Lid is in pretty bad condition with damage caused by someone attempting to conceal rust with filler…

Here ,the new front guard is fitted to check alignment.

First coats of Primer to find small blemishes.

Drivers side front guard and dor repairs .A small rust hole at the front needs welding .

Inner part was remade and welded in .

First coats of epoxy primer .Guards are fitted up at this point.

280CE Rust Repairs Pt 4.

So most of the rust has been removed from the basic body shell and now the doors,boot lid and bonnet get attention. As the paint is removed lots of dents are revealed.

Boot Lid Rusted along bottom edge and into the frame. The skin has been damaged by someone making holes to “key” the filler to the skin,and which is 4mm thick in places. It has to be removed or the lid replaced.
Right rear quarter During rust and dent replacement .

After repair basics The tail light aperture has been remade .

Left Side rear quarter

Paint and thick filler removed .

Roof and quarter stripped to bare steel.

Driver side quarter replaced .
Drivers door has minor rust damage
Passenger side (left) Door replaced with NOS door

Passenger side door had been badly patched and covered in thick coats of filler so a better NOS door was sourced to replace that one .

Rear tail panel bashed in.

A bit hard to see here but tail panel was dented,then covered with filler, then dented later again . All of the old paint had to be removed to get the panel back into line.

Stright edge reveals how much it was dented.

The panel was pushed in 10 mm ,but filled instead of being straightened in the past.

Why I hate selling cars!

In February this year 2022 My Workshop went underwater which held several classic Mercedes. Amongst them was 300SEL 6.3 which I had been driving since 2008 when I had rebuilt it from a tired wreck. As I’m getting very old and the bus is getting ready to leave the bus top I decided to see if I could sell the car to a enthusiast who would use it to restore (a huge undertaking) .Well ,my attempt to sell on ebay bought forward a couple of enquiries, one of which asked just how badly it was affected,which truth be told was quite badly. But the other person known only as Walterhall 1234 decided the best chance he had to own my car was to insult me and call me names ,none of which hurt ,and I’ve struck his type before,trying to buy into something expensive by running the item for sale down. Here is the last email he sent me…as i own the car and he doesn’t and never will , I feel that he will go on through life missing out on the true joy of owning a rare Mercedes. Here is his email for all to enjoy.

“I don’t wan’t an engine I want a parts bin, like your shed on wheels, that old wet rat,
that you thinks worth nearly £18,000 pounds, with stinky carpets and milky wood with turds behind the rev counter,
with titanic rusty inner sills, that seams are rotting away like wet drowned rat, you should speak to a Texan or Arizona man they know about smart people and proper Mercedes guys, that buy 300sel shells of them all day long and send them all over the world to re-shell on rotten 300sel bodies like that rare car you made a mess of and ruined, haven’t you got a hill near your house or did you not think.?
I noticed they’re where no inside shots, bad is it, so where you going to get an interior from and original carpets from then, well you can’t, so why don’t you just do the right thing and pass it to a none invalid to fix up, I’m not interested unless it’s for peanuts, for monkey pox and that’s you, think your proper, that thing looks stupid like a clowns car chrome wheel arches are they rotten also, with them wheels, painted black, did you have a mid life crisis, things only got 250bhp my S65 got twice that, what you like, maybe you should get a shitty British car as you not capable of taking car of a classic are you?
Yeah I’m poor your right that’s why I write screenplays and live in a 3M pound designer mid century house, I’ll send you a link to youtube as I don’t really care for this car to be honest, it was a trade in on a 928 S4 i’ll crush next week, show your friends you helped to do another one in, shame buddy sounds like it’s got the parts you needed also been a 1969 original G180…”

PS,All parts for The W109 are available with a click of the mouse from lots of online vendors. And I dont think I’ll sell my 6.3.

Mercedes W114 280CE Rust Repair part 4 .

Right rear boot flange bowed inwards and rusted out .

Panels fabricated to repair rust ,both obvious and hidden.

Right rear boot lip was rusted out so it was removed,revealing hidden accident damage from the past.

Lower right part of this panel has been crudely bashed back into shape. Note the split on the curved part.
1/4 panel was removed to get access to the B pillar and internal rust .Sill panel is also secured under this part.

Pieces tacked into place replacing rusted out parts and restoring strength to the body structure.

Inner chassis rail rust removed and inside of chassis cleaned and painted.

New 1/4 panel fabricated and welded into place with new sill panel.
Inner wheel house section repaired
Left rear boot drop outer panel rusted and badly repaired in the past.
Left rear corner rust removed .
New outer panel to replace rusted section.
Inner part of left boot drop section repair section being made.
Panel welded into place.
New sections welded into place.
New boot lid flange section fabricated and welded into place.
Drivers side 1/4 panel final fitted and welded into place

Flood damaged engine and trans removed.
With the engine out , old repair work and bad repairs have been exposed.
Under the steering box is a large patch of silicone…! to hide a rust hole?

Mercedes W114 280CE coupe ust repair Part 3

After several months of holdups (massive flood and damage) I have started again on this car. The car is temporarily up on the hoist to get a better idea of which parts to make and repair.

The paint quality was so bad that it basically fell off revealing a badly damaged surface.

Right rear corner damage revealed after body filler is removed.

Left rear corner ,more hidden damage revealed.

Spare Wheel well bashed in and has to be repaired.

Left rear wheel house chassis section rusted through.

Left rear 1.4 boot drop outter panel rusted through and badly filled.

Left rear 1/4 full of filler.
Beaver tail panel above the exhaust damaged and was hidden by filler.

Rust holes in the rear floor as seen from under neath.

passenger side from underneath ,more rust under the seat cross member.

Drivers side,rear of front floor under the seat channel ,rusted through.

Light shining through holes in the rear of floor on Drivers side.

Passenger side rear jack point rust damaged.
Under passenger side seat channel,rusted out.

280CE right hand 1/4 panel replacement

RUST Repair Pt.3

With the new sill section fitted ,the next step is to remove the right 1/4 panel to remov all the body filler and hidden rust.
This Jig is placed befoe the 1/4 panel is removed to keep the lid opening and alignment correct.
With the panel removed the hidden damage is revealed.
right rear trunk drop rust repaired.
Preliminary inner wheel arch repaired .
Wheel house front repairs
Inner structural repairs on right side completed
Trial fit of newv 1/4 panel .

280CE rust repairs part 2.

The floor sections are badly rusted but that is not as serious as the rust in the bottom of the B pillars which are now disconnected from the upper structure seriously weakening the cars body. All can be fixed but it appears this job is going to take longer than anticipated.

Further to the previous blog regarding this Blue 280CE W114 , this is the left hand rear wheel house showing what was visible before the black bitumen was removed.
Right hand side which had a patch made from calking compound and black tar.
The Right hand side after being partially cleaned tp expose the corrosion
Above the right rear jack point the inner part of the body structure has corroded away.
The paint is very shiny but the finger is pointing at rust bubbles appearing ,a sign the panel has hidden rust….
This the base of the B pillar post it is missing about 100 mm where it secures the rear floor and sill pan to the B pillar.
Inside the shiny panel above, filler has been applied in the past over rust and can be seen where it oozed through the panel. This has to be removed and new piece welded in.
Another view of the above , lots of filler . That’s the rear window mechanism .
The opposite side is just as bad with an old sponge laying there plus gum tree leaves which probably helped the rust form.
At present the car is held together with braces to prevent distortion as most of the rust removed involved removing a lot of the base structure.
I removed the door to prevent the A pillar from moving under the weight . The top of the sill is cut away and twisted down to expose the spot welds . The square thing in the sill is piece of Sandpaper someone had jammed inside to hold the filler they had applied and block some of the holes. The other stuff in there is pieces of filler and lumps of rust.
This is what was left of the left hand side,full of Spray foam and pieces
of alloy flashing used to hold the sill together. The white thing in upper left of the picture is a paint sample tag used to block holes in the sill.

Inside the left sill .The sills had rusted before and been covered with another sill panel which had also rusted out. The two layer can be seen in the upper part of the picture.
A big block of spray foam….
More Spray foam… I began to think a previous owner was a carpenter who didn’t know how to weld…
Lumps of filler in the right hand sill. It must rattled a bit..
The front of the left floor was removed to remove rusted parts and gauge the worst of the rust.
Yet more Spray foam . The under brace is OK and will be reused after the rust is removed . the inner sill will be replaced before the rest is removed. The seat mounts will have to be remade as they are rusted right off.
Under the rear floor there are some rust outs which need to be repaired the lighter part is a hole which covered with metal flashing.

Mercedes 280CE

Engine and general mechanical check over and Rust Repair

This car was booked in some time back for a mechanical tune up but the owner had found signs of rust ,which he asked me to provide an estimate of costs to sort it all out.

A price was agreed to and a start has been made. Although the car looks great it is in dire strait sand appears to have been sitting somewhere for a very long time in long grass or possibly on it’s belly.

Firstly a set of new sills and floor panels were ordered but thanks to the virus this took far too long for the parts to arrive (never use the Pitney bowes global shipping program,) while the wait was happening the interior has been removed to get reupholstered ,

Here the front bumper,bright sill moulding and mudguard on the drivers side have been removed
this the front of the right hand sill/rocker at the base of the A pillar .This will be completely replaced ,but first the floors…

it was necessary to start here as it was suspected that the rust was really extensive.

Most of the sills are composed of polyester body filler.

same area looking down,below the tape can seen a 10mm thick layer of filler,used to fill rust holes.
This is the left side , to fill in the space someone has added pieces of foam packing material ,stuffed into the cavity.

The Left side is proving to be very problematic because the guard appears to have been welded to the sill. it will have to bwe cut off to get access to the worst rust.

Not a very good picture but what it shows is the lack of floor between the sill and the front floor. It had been patched in the past with pieces of steel which appear to be from a Fridge or washing machine and tar. that is the floor visible under the car.

The floor will have to bwe rebuilt completely before the rotted out sills are removed,the car will collapse otherwise.

Left side seat mount stuck down with tar. the white parts are peices of old fridge panels covering rust this has been removed.

To remove the seats it was simply a matter of lifting them up and out,the mounts were so rusted they came apart.

This is a massive blob of old body filler which probably weighs 3 kgs. that stuff is expensive so aomeone must have been getting it for free.
Inside the rear of the left front wheel house ,what is shown here is the front of the sill,again covered in a thick layer of filler which is preventing the guard from being removed .
inorder to rty and free the guard ,filler was ground out along the sill line and as can be seen is nearly 20 mm thick.
Inside after the remains of the old carpet were removed,the tunnel was discovered to have Rockwool insulation glued to it. Not the safest stuff to be around,it was removed carefully and disposed of. This isn’t normal for Mercedes.
It was neccessary to lift the car up onto stands to get better access and in doing so these ancient wheel spacers were found on the rear wheels. They are made of alloy and were crumbling away…not good!
This is the ECU for the Djet fuel injection which was floating around free, these need to be removed when welding on this model of car as voltage spikes shorten the life of them. This one,unfortunately has been used in the car without it’s cover and this has allowed dirt to get into it.
Dirt all over the electronics,which will be cleaned out before the car is run again .
Driver side sill,A pillar bottom. This will have to replaced .
Drivers side seat belt mount. New ones are being fabricated as parts are no longer available for these now.
New Drivers side flor to the right of the picture .The holes will cut out and new steel welded in
new Drivers floor and inner sill section being tried for size.
This is the inner sill section with the bottom cut off .To the left,that is the base of the A pillar and jack point ,which although rusty is still very sound ,again massive blobs of filler are inside the sill .as can be seen the inner surface of the outer sill section is very rusted.
Another big pile of tar and stuff used to’ hide the rust. A piece of the removed floor is in the left of the picture and that’s the rear wiring loom hanging down .

The underside of the car has yet to be stripped of all the tar etc but it has been deemed easier to replaced the rusted sections first,to save time.

This is the drivers side B pillar…
Drivers side wheel house with the new floor being tried for size .Lots of rusted patches such as the piece laying on the floor demonstrates .
In the upper left from this angle can be seen that the out sill panel was actually sticking outwards.
This is one of the braces under the drivers floor which has been polished and painted with high zinc etch primer.

to be continued now that the materials to build all the replacements for the rear floor section has been ordered.