Tag Archives: vaquablast process

Mercedes Benz 280SE 3.5 ute

IMG_0021 (1)

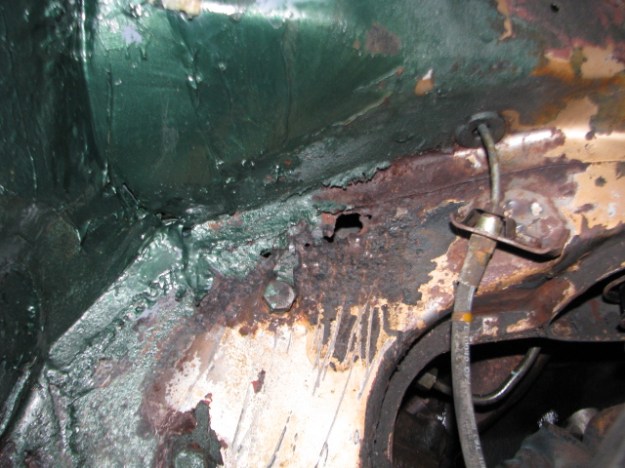
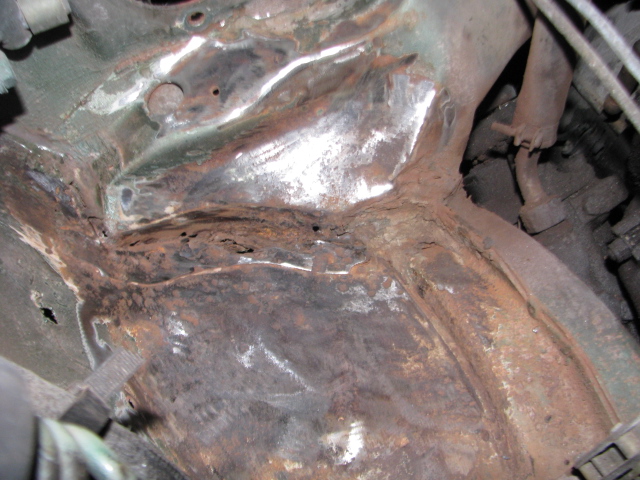
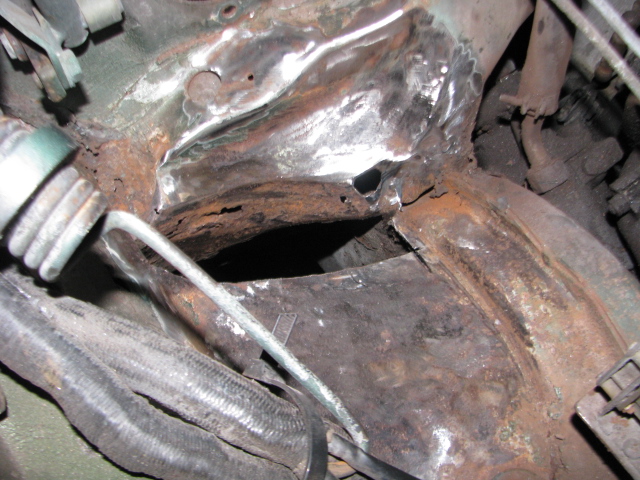
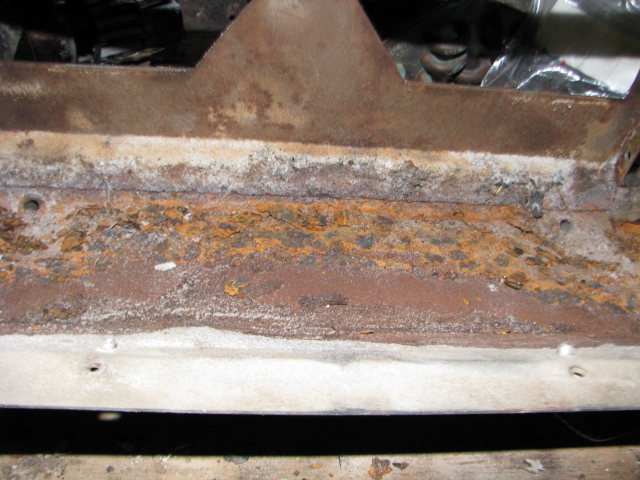
25/06/16 Well…. here is a problem that no one foresaw , the drivers side chassis rail is rusted clear through ….and wait ,there is more.:-(

IMG_0022

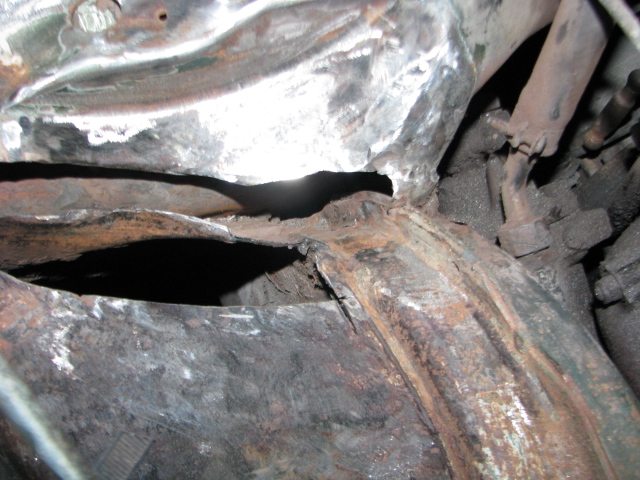
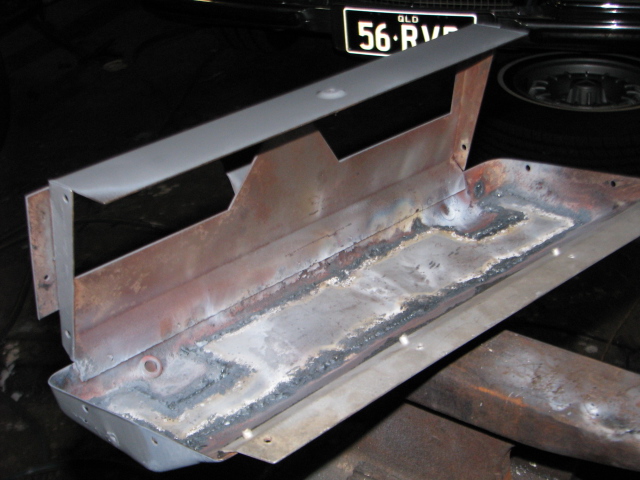
Front ends of Sill boxes are rusted out

IMG_0023

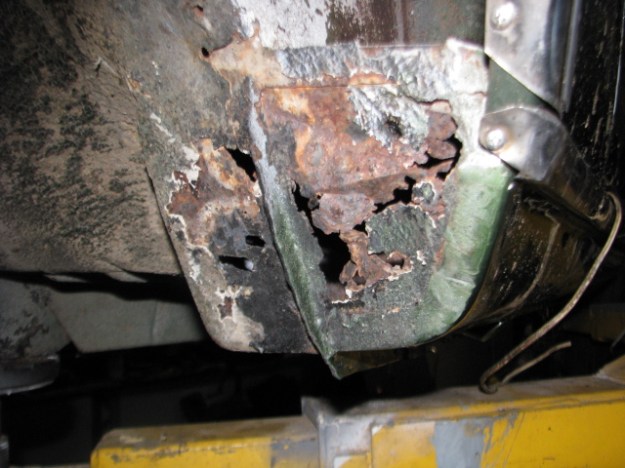
Passenger side rusted out , all will have to repaired .

IMG_0024 (1)

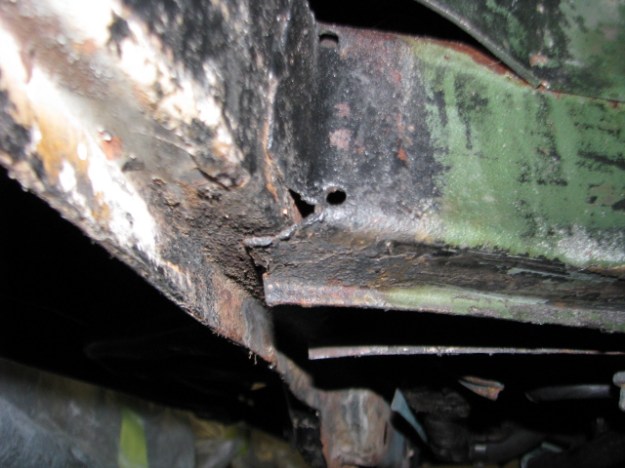
Front cross member behind bumper has been replaced at sometime in the past but never welded to secure it in place ….Not a good idea as it is just floating there.

IMG_0026 (1)

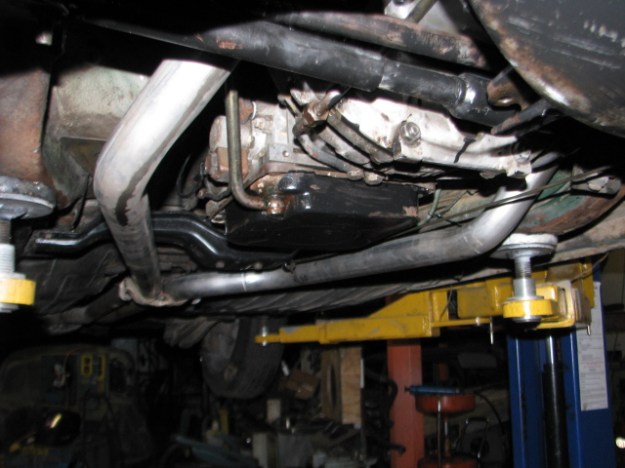
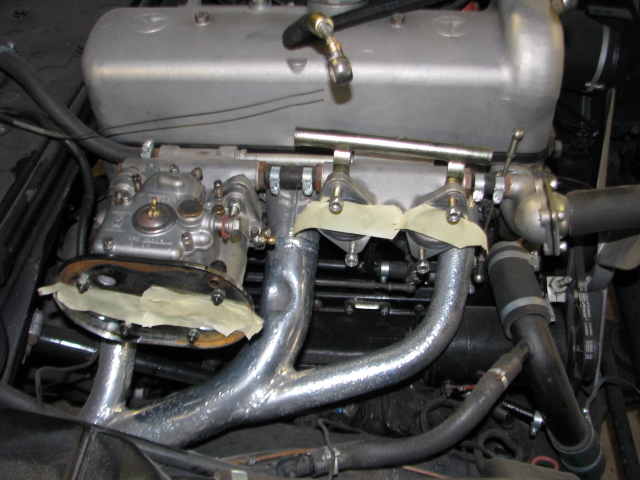
New exhausts installed to replace the rusted out originals which had lasted since 1972!.

Drive shaft has new flex disc and trans has new shift rod bushes.


Mercedes Benz 280SE 3.5 ute Engine swap.

The new engine and trans are installed with a new oil pan ,rear and front crank seals. New injectors with new intake manifold gaskets,timing chain and rails should see a nice reliable tow car for the owner 🙂 .New fuel hoses and clamps will connect the fuel system together .

Mercedes 280 SE 3.5 ute conversion.

IMG_0331 IMG_0332

In these  pictures of the distributor, the inside is full of the damned bicarb which was used to strip the older paint of the cars body before painting.

The distributor will be stripped and overhauled because the bicarb will affect the fuel injection trigger points which are in the lower part of the distributor.

IMG_0333

IMG_0334In this picture it can be seen that the bicarb has infiltrated the igniton wiring.

Mercedes 280SE 3.5 ute, brakes and air con overhaul

The booster was a bit rusty looking so i t has been decided to strip it down. and clean it up .After pulling the master cylinder off,it could be seen that the booster was full of fluid….. IMG_0137 IMG_0139as can be seen ,the booster contained close to 3 liters of brake fluid.

tIMG_0141

The steering column was then pulled and examined,more BiCarb! ,and the paint had been attacked and needed redoing . IMG_0142 IMG_0143

IMG_0145 IMG_0146 IMG_0149This picture shows the extent of the biCarb inside the gearshift mechanism.

Under the booster,the firewall and the right front chassis rail join was rusted out . The rusted metal is removed and replaced with fresh metal.

IMG_0157 IMG_0158 IMG_0159 IMG_0160

Nest Job was to rebuild the Air con and once the housing was opened up,it could be seen that the evaporator was full of fluff and BiCarb.

IMG_0161 IMG_0162 IMG_0163 IMG_0164

IMG_0165IMG_0167

The bottom of the evaporator housing was rusted out so a new peice of Zinc anneal was welded into place to repair the bottom .Condensation won’t leak into the car now,.IMG_0168 IMG_0169the evaporator has been flushed and the fins cleaned and straigfhtened .Once the new bottom was welded in ,the housing and panels were zinc primered,then primed and fisnh coated in black .The foam liner was replaced and the unit reassembled and the fans tested .

IMG_0171 IMG_0172 IMG_0173 IMG_0174

Weber DCOE rebuild

I’ve been restoring a 190SL for an owner and part of the task involves rebuilding it’s non standard DCOE carbs. A lot of W121’s were fitted with these over years to get around the problems thrown up by the awful Solex side draft carbs originally fitted.

Work shop 7 005
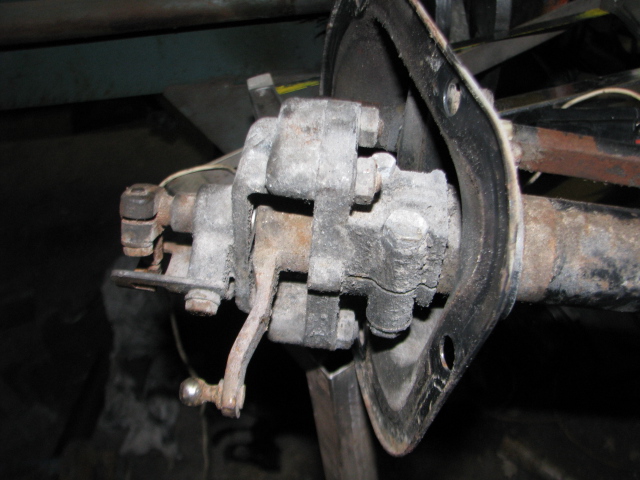
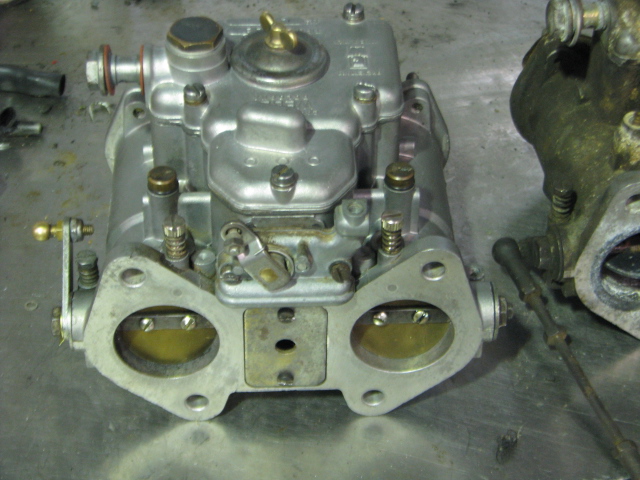
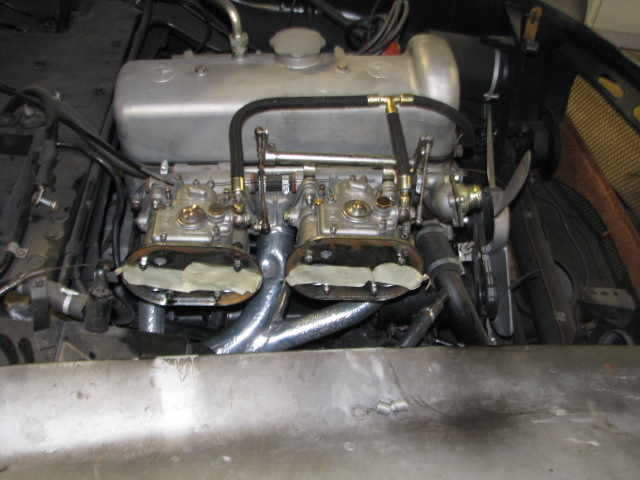
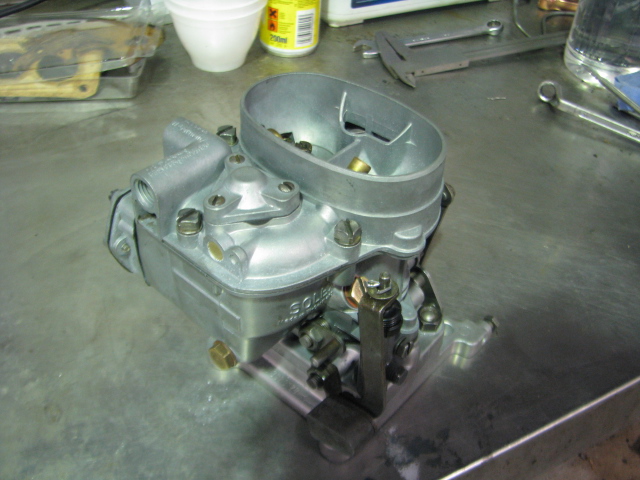
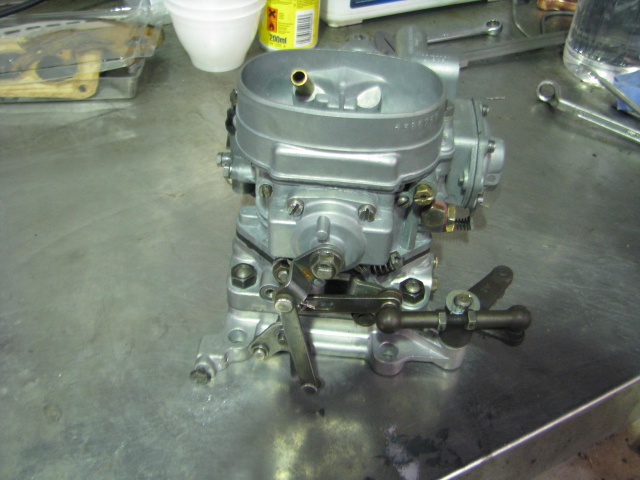
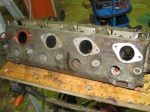
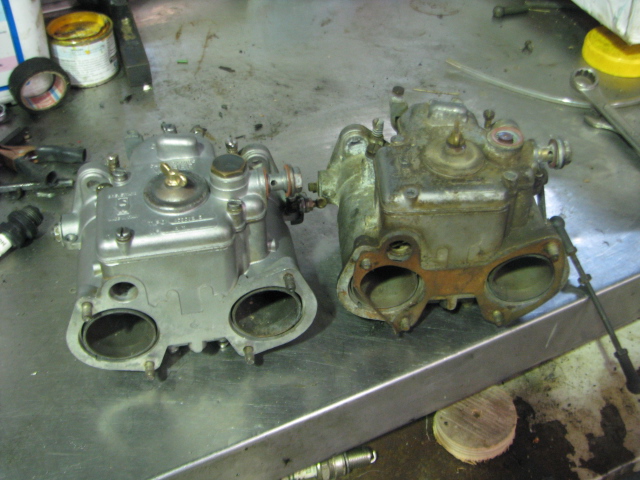
Carb on the left has been rebuilt

Work shop 7 006
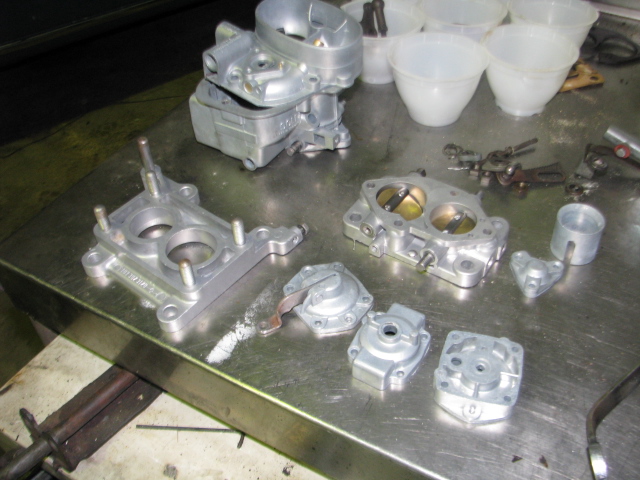
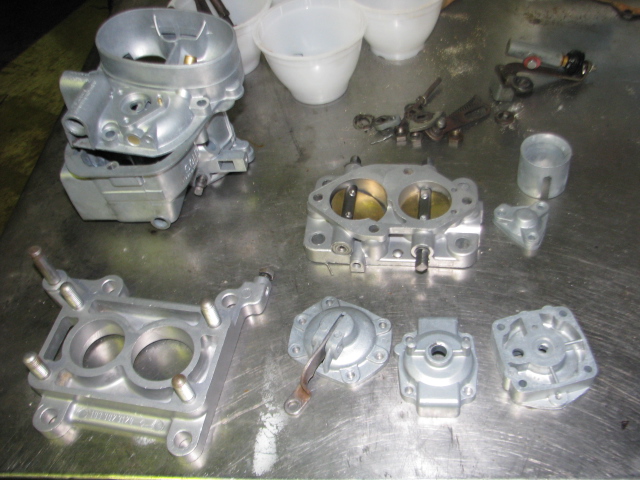
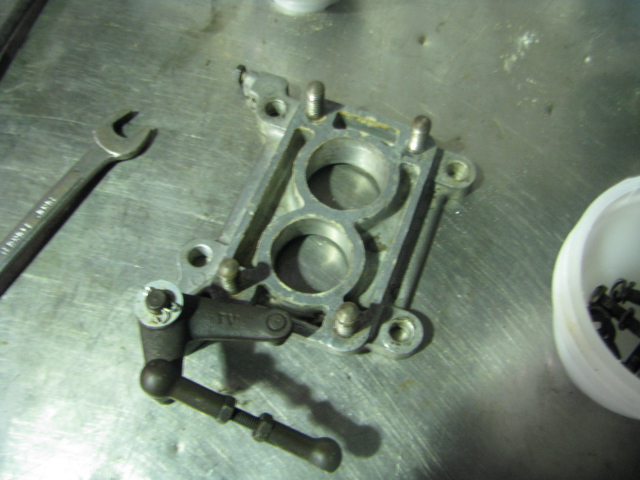
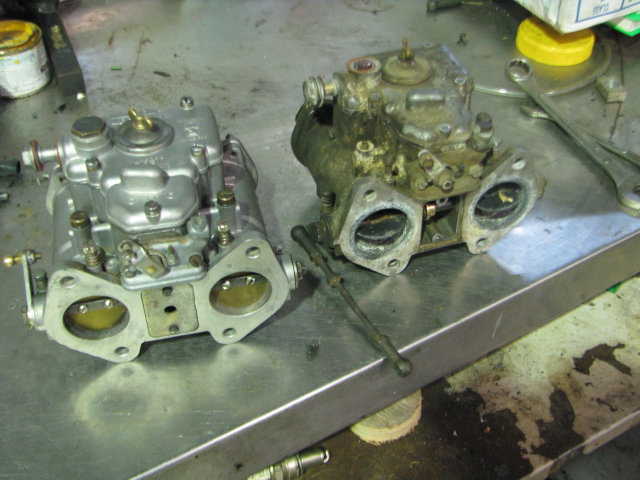
Carb on the right is in as is condition with blocked jets and water damge 


Work shop 7 007Work shop 7 008

As can be seen in the left photo the chokes have signs of water from the fuel supply.Carb on the right after stripping ,wet blasting and rebuilding.

Below is how the original fuel pipe looked before restoration .

Work shop 7 009 Work shop 7 010

Below the original pipe after replating the pipe and ferules with the ends resoldered back in place.

Work shop 7 011 Work shop 7 013 Work shop 7 015

Temporary mock up of the rear carb in place.

450EBAY 035

Borgward Isabella Solex Carburetor

i was asked recently if i could overhaul this Solex twin down draft carb. It’s a 32 PIAATA the same as found on Mercedes 220Sb W111 models of the early 1960’s. This one was making the car hard to start. Everything appeared normal on strip down but it’s missing a vital part,a valve in the accelerator pump.I’ve given the housings a clean while waiting for the gaskets to be delivered.

workshop 6 045workshop 6 044

There is also a special adapter for the Borgward manifold .

workshop 6 043

Wet blasting of alloy engine parts.

First developed in England in the 1940’s,this is a process where water and compressed air is used to clean delicate parts and restore the finish to an ‘as new’ surface. Also known as vapour blasting or slurry blasting  ,it is almost a green process as no caustic chemicals are required to remove dirt and oxidation .

Pictured are a pair of Porsche 928 cam boxes (yes i will work on any quality car!) . the lower is a ‘before ‘ example with burnt on oil and badly oxidised surface. The above it is an example of the finish achieved by just cleaning. next pic shows a 928 cylinder head as removed ,again very oxidised . Thwe 3rd picture shows the bare heads,all clean ready for valves ,springs seals etc to be fitted.

Feel free to call about your parts restoration and what i can offer.