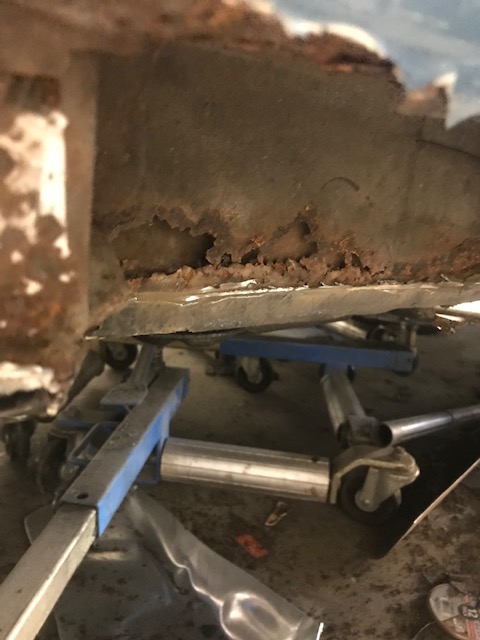
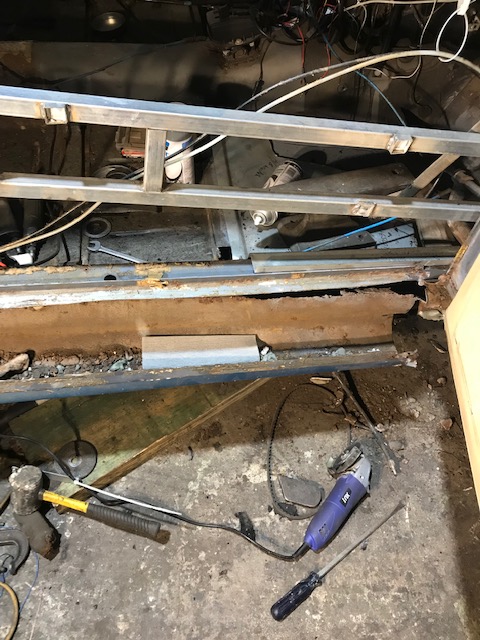
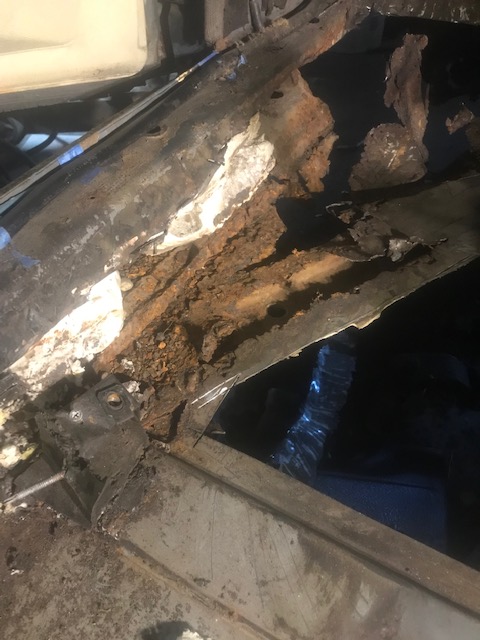
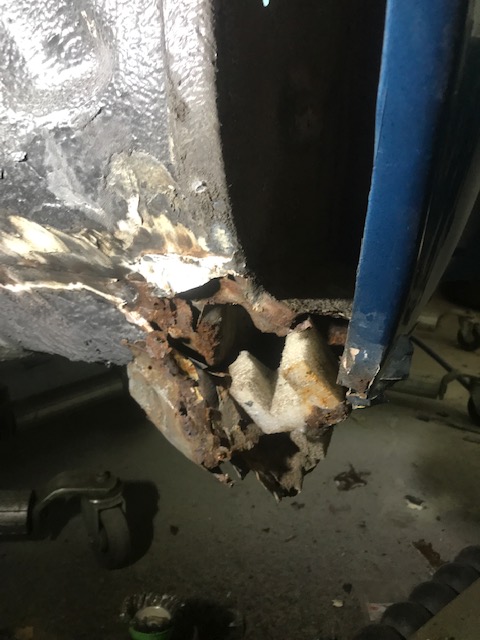
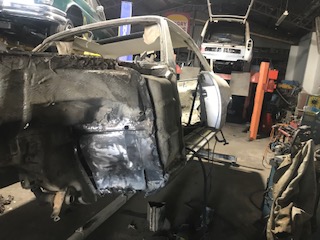
The floor sections are badly rusted but that is not as serious as the rust in the bottom of the B pillars which are now disconnected from the upper structure seriously weakening the cars body. All can be fixed but it appears this job is going to take longer than anticipated.
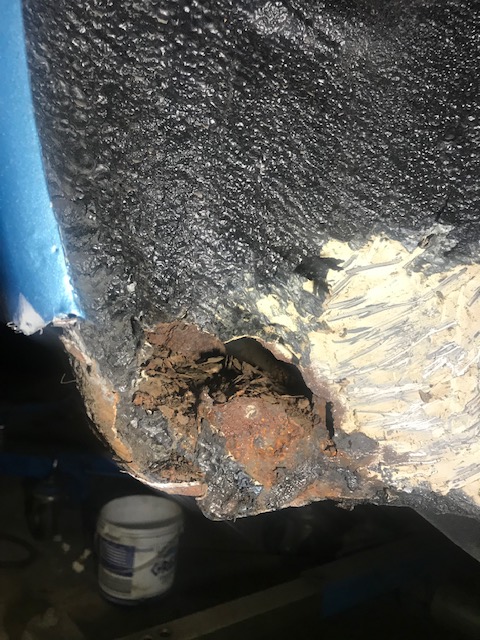
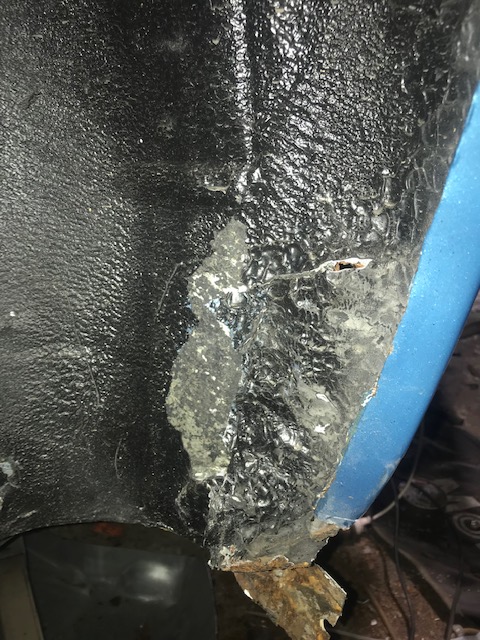
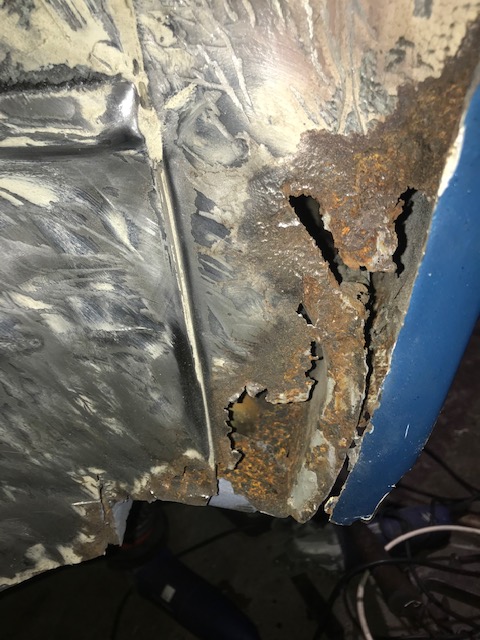
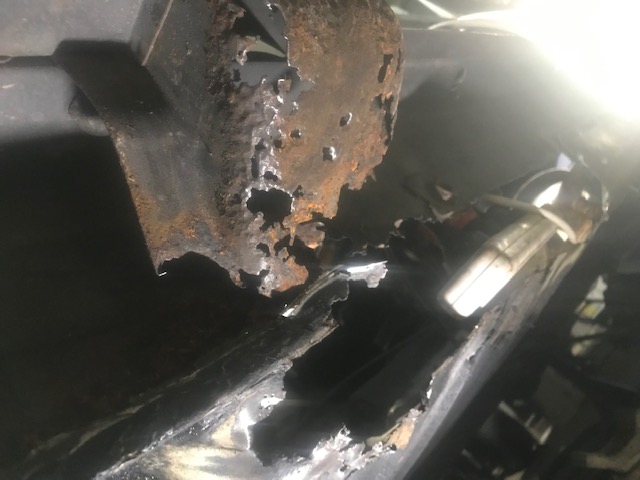
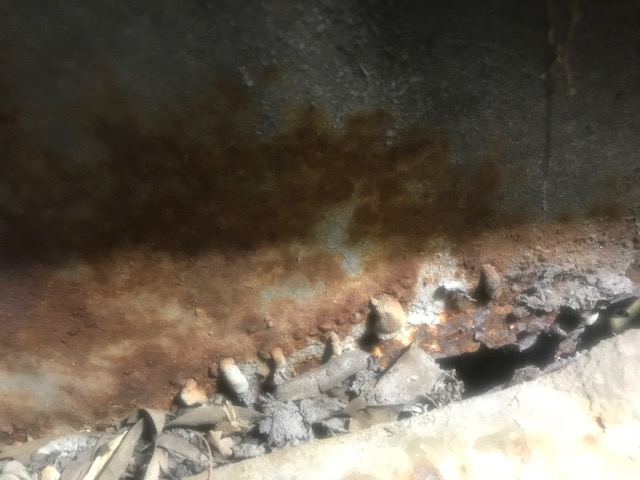
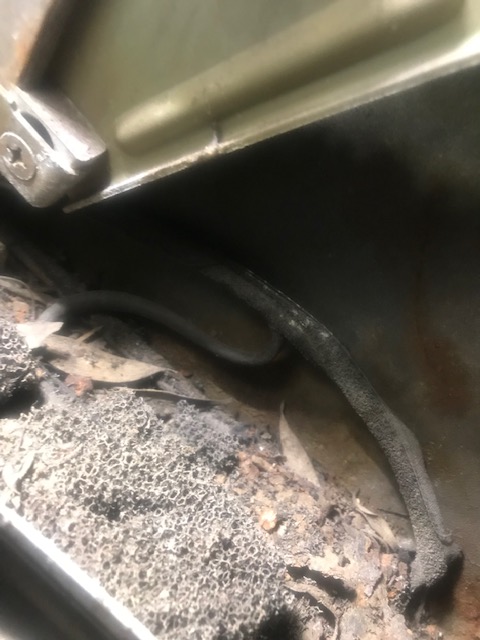
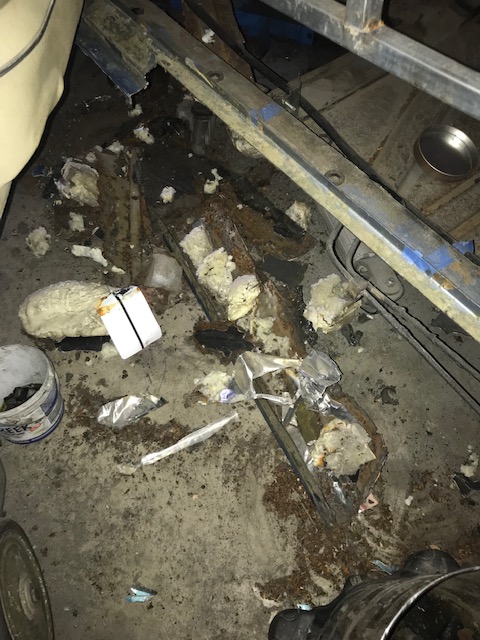
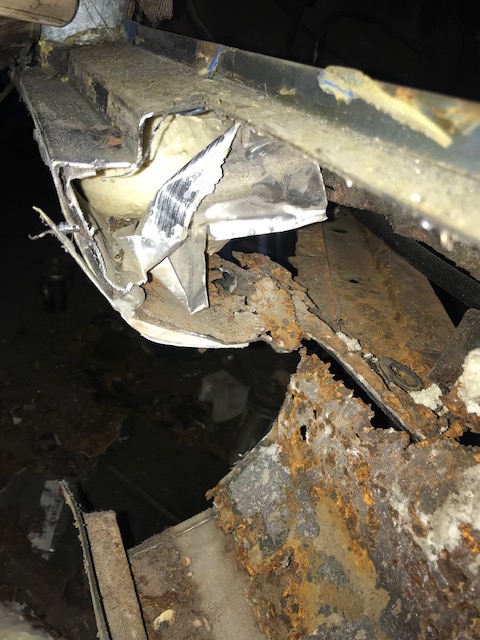
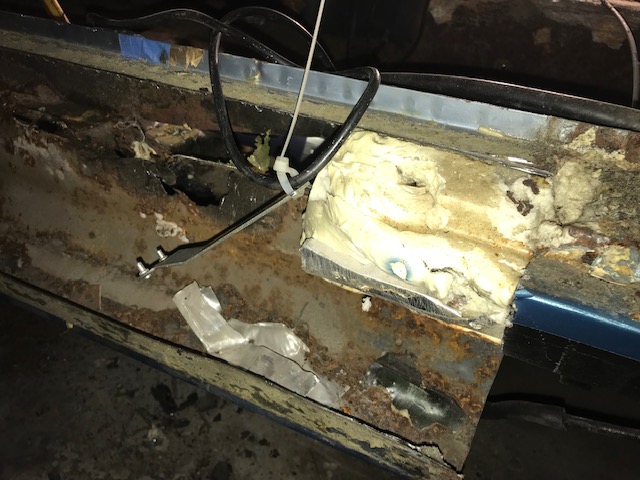
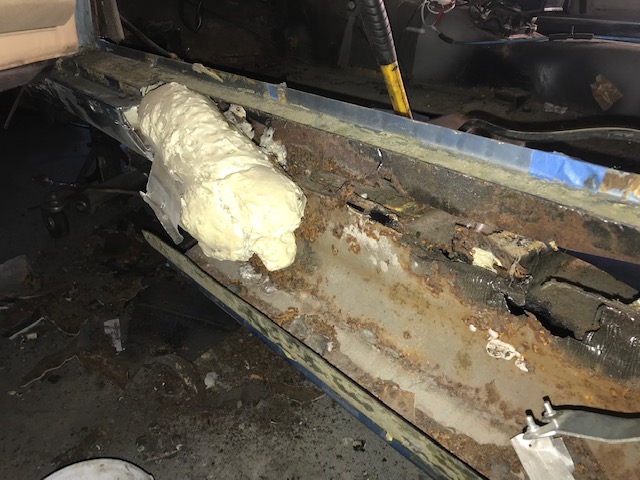
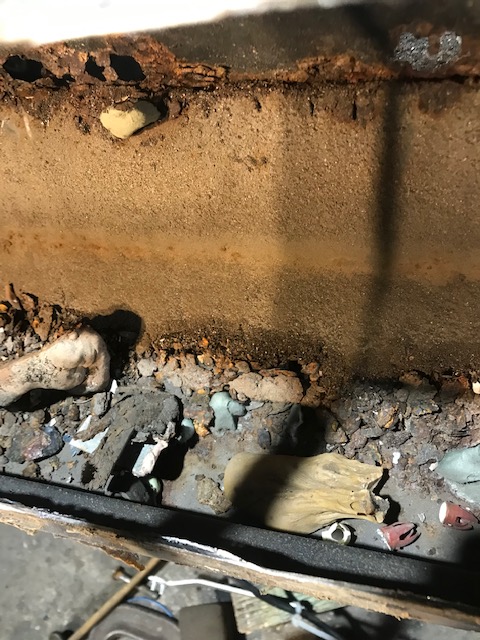
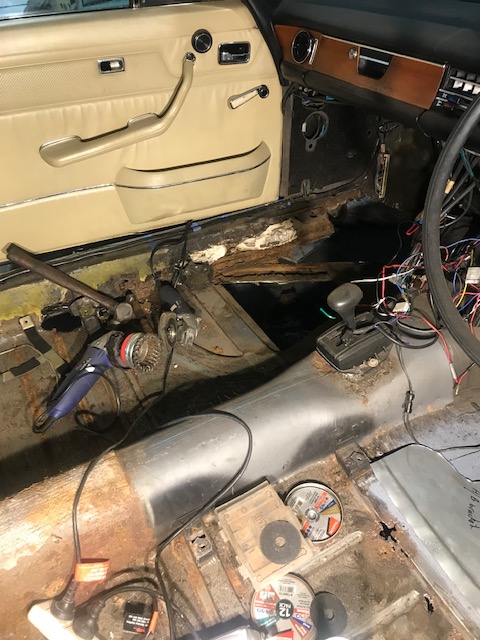
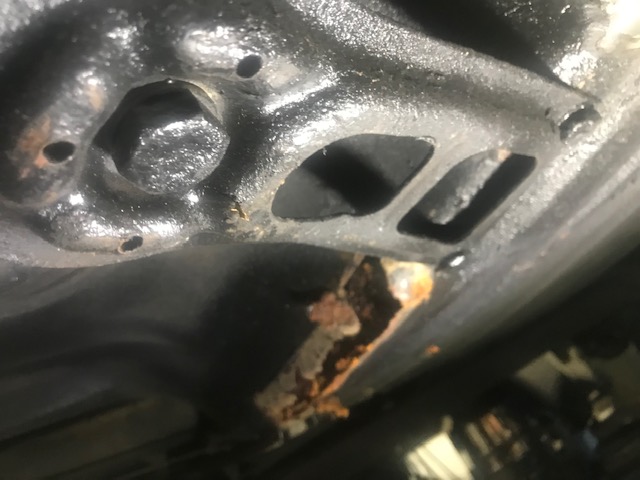
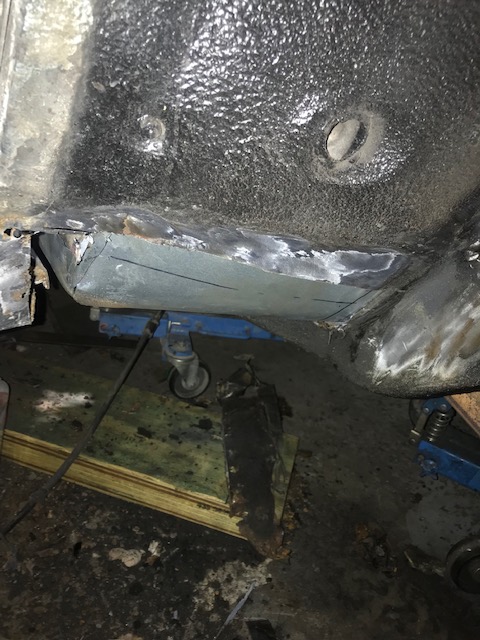
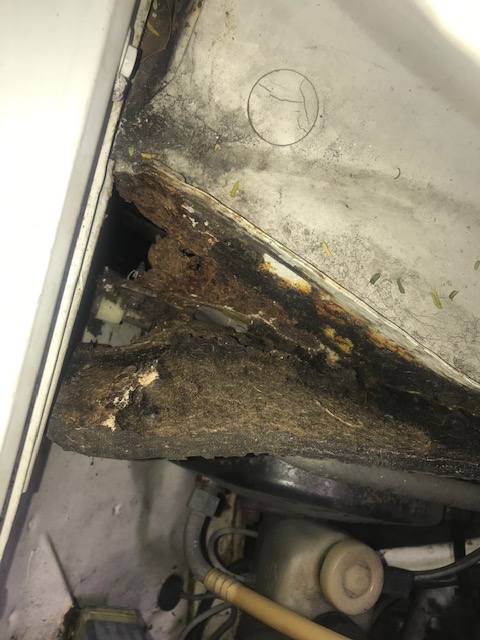
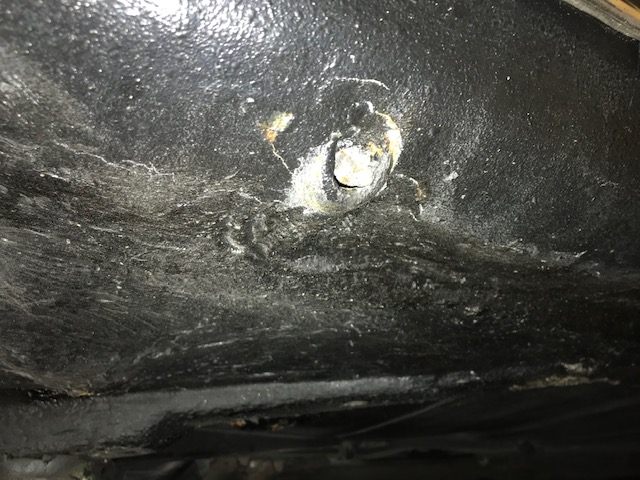
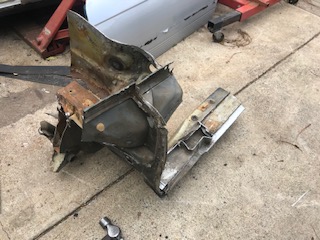
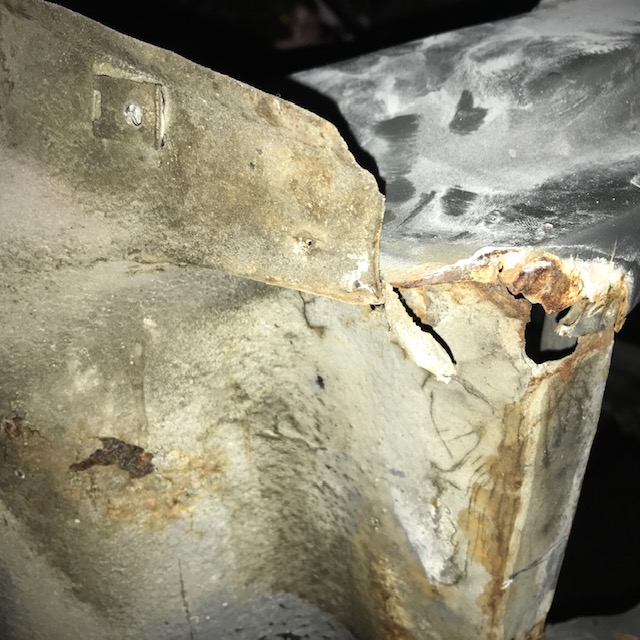
Further to the previous blog regarding this Blue 280CE W114 , this is the left hand rear wheel house showing what was visible before the black bitumen was removed.Right hand side which had a patch made from calking compound and black tar.The Right hand side after being partially cleaned tp expose the corrosion Above the right rear jack point the inner part of the body structure has corroded away. The paint is very shiny but the finger is pointing at rust bubbles appearing ,a sign the panel has hidden rust….This the base of the B pillar post it is missing about 100 mm where it secures the rear floor and sill pan to the B pillar. Inside the shiny panel above, filler has been applied in the past over rust and can be seen where it oozed through the panel. This has to be removed and new piece welded in. Another view of the above , lots of filler . That’s the rear window mechanism .The opposite side is just as bad with an old sponge laying there plus gum tree leaves which probably helped the rust form. At present the car is held together with braces to prevent distortion as most of the rust removed involved removing a lot of the base structure. I removed the door to prevent the A pillar from moving under the weight . The top of the sill is cut away and twisted down to expose the spot welds . The square thing in the sill is piece of Sandpaper someone had jammed inside to hold the filler they had applied and block some of the holes. The other stuff in there is pieces of filler and lumps of rust. This is what was left of the left hand side,full of Spray foam and pieces of alloy flashing used to hold the sill together. The white thing in upper left of the picture is a paint sample tag used to block holes in the sill. Inside the left sill .The sills had rusted before and been covered with another sill panel which had also rusted out. The two layer can be seen in the upper part of the picture. A big block of spray foam…. More Spray foam… I began to think a previous owner was a carpenter who didn’t know how to weld… Lumps of filler in the right hand sill. It must rattled a bit.. The front of the left floor was removed to remove rusted parts and gauge the worst of the rust. Yet more Spray foam . The under brace is OK and will be reused after the rust is removed . the inner sill will be replaced before the rest is removed. The seat mounts will have to be remade as they are rusted right off. Under the rear floor there are some rust outs which need to be repaired the lighter part is a hole which covered with metal flashing.
Engine and general mechanical check over and Rust Repair
This car was booked in some time back for a mechanical tune up but the owner had found signs of rust ,which he asked me to provide an estimate of costs to sort it all out.
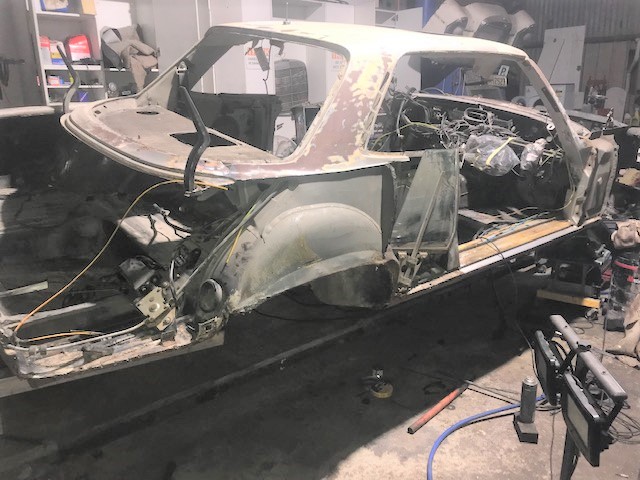
A price was agreed to and a start has been made. Although the car looks great it is in dire strait sand appears to have been sitting somewhere for a very long time in long grass or possibly on it’s belly.
Firstly a set of new sills and floor panels were ordered but thanks to the virus this took far too long for the parts to arrive (never use the Pitney bowes global shipping program,) while the wait was happening the interior has been removed to get reupholstered ,
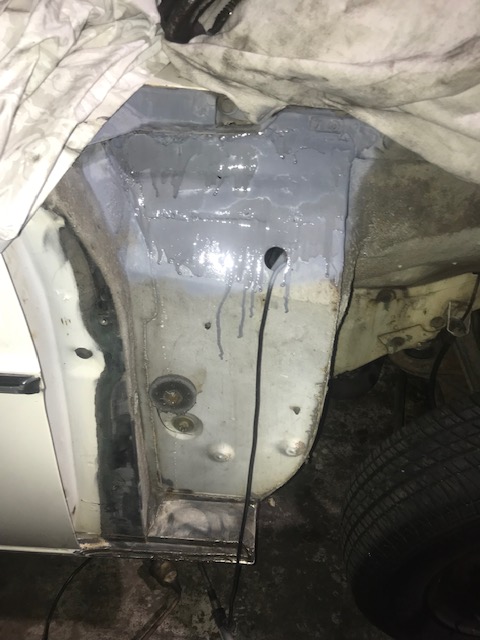
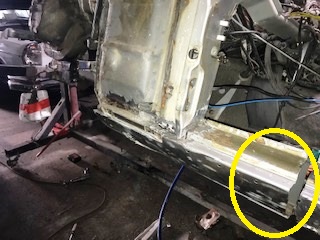
Here the front bumper,bright sill moulding and mudguard on the drivers side have been removedthis the front of the right hand sill/rocker at the base of the A pillar .This will be completely replaced ,but first the floors…
it was necessary to start here as it was suspected that the rust was really extensive.
Most of the sills are composed of polyester body filler.
same area looking down,below the tape can seen a 10mm thick layer of filler,used to fill rust holes.This is the left side , to fill in the space someone has added pieces of foam packing material ,stuffed into the cavity.
The Left side is proving to be very problematic because the guard appears to have been welded to the sill. it will have to bwe cut off to get access to the worst rust.
Not a very good picture but what it shows is the lack of floor between the sill and the front floor. It had been patched in the past with pieces of steel which appear to be from a Fridge or washing machine and tar. that is the floor visible under the car.
The floor will have to bwe rebuilt completely before the rotted out sills are removed,the car will collapse otherwise.
Left side seat mount stuck down with tar. the white parts are peices of old fridge panels covering rust this has been removed.
To remove the seats it was simply a matter of lifting them up and out,the mounts were so rusted they came apart.
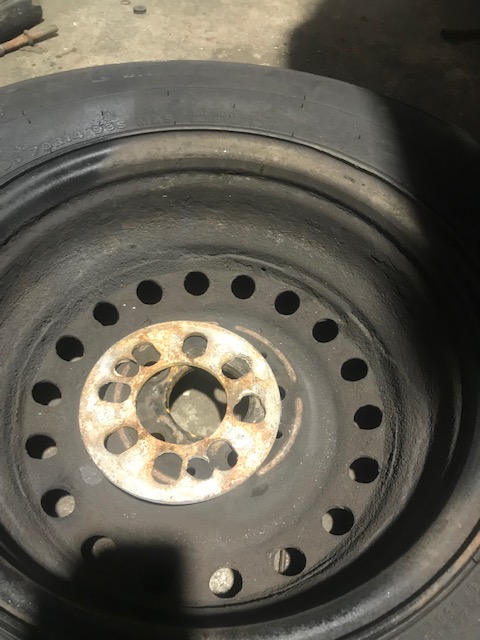
This is a massive blob of old body filler which probably weighs 3 kgs. that stuff is expensive so aomeone must have been getting it for free. Inside the rear of the left front wheel house ,what is shown here is the front of the sill,again covered in a thick layer of filler which is preventing the guard from being removed .inorder to rty and free the guard ,filler was ground out along the sill line and as can be seen is nearly 20 mm thick. Inside after the remains of the old carpet were removed,the tunnel was discovered to have Rockwool insulation glued to it. Not the safest stuff to be around,it was removed carefully and disposed of. This isn’t normal for Mercedes. It was neccessary to lift the car up onto stands to get better access and in doing so these ancient wheel spacers were found on the rear wheels. They are made of alloy and were crumbling away…not good!This is the ECU for the Djet fuel injection which was floating around free, these need to be removed when welding on this model of car as voltage spikes shorten the life of them. This one,unfortunately has been used in the car without it’s cover and this has allowed dirt to get into it. Dirt all over the electronics,which will be cleaned out before the car is run again . Driver side sill,A pillar bottom. This will have to replaced .Drivers side seat belt mount. New ones are being fabricated as parts are no longer available for these now. New Drivers side flor to the right of the picture .The holes will cut out and new steel welded in new Drivers floor and inner sill section being tried for size.This is the inner sill section with the bottom cut off .To the left,that is the base of the A pillar and jack point ,which although rusty is still very sound ,again massive blobs of filler are inside the sill .as can be seen the inner surface of the outer sill section is very rusted. Another big pile of tar and stuff used to’ hide the rust. A piece of the removed floor is in the left of the picture and that’s the rear wiring loom hanging down .
The underside of the car has yet to be stripped of all the tar etc but it has been deemed easier to replaced the rusted sections first,to save time.
This is the drivers side B pillar… Drivers side wheel house with the new floor being tried for size .Lots of rusted patches such as the piece laying on the floor demonstrates .In the upper left from this angle can be seen that the out sill panel was actually sticking outwards. This is one of the braces under the drivers floor which has been polished and painted with high zinc etch primer.
to be continued now that the materials to build all the replacements for the rear floor section has been ordered.
his W114 is a low mileage example which is unfortunately show a bit of rust in the fresh air plenum in the cowl .
Picture on the left is the right hand corner ,the insulation pad has been pulled aside to get a look at the damage. the right picture shows the inside with the hand brake mech on the side where rust has come through there too.
Before the rust is cut out
1/2 way through the cutting process.
The Right side front guard has been removed
The Right side front guard has been removed to get access to the rust on the cowl. the hole at the top was caused by moisture getting into the weld seam over the last 50 years.
The whole rustyb part was cut out,revealing more rust inside the plenum which can only be accessed from the engine compartment. New steel is welded into place ,etch primed then zinc primed .This will be painted body colour and then wax treated.
The sound and heat insulating pad has been removed to expose the rust.
A bit hard to see here but the front panel on the cowl has been removed to expose the inside of the plenum. the grey is factory primer ,which was removed and replaced with etch primer then zinc primer ,to be coated with body colour and wax coated to prevent rust in the future .The Shiney grill is the fresh air intake and it allows water to get into the plenum when it rains. This has been removed to gain access to the entire plenum and repair spot rusting.
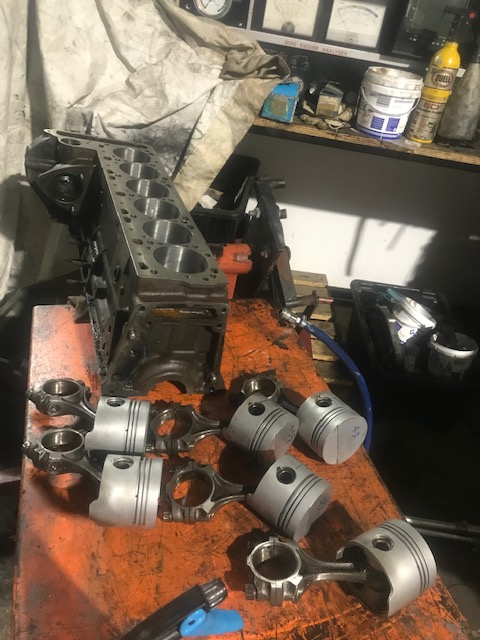
This is an engine bought to me recently for a rebuild. It had been rebuilt in the past but over heated due to a leaking and corroded cylinder head. Unfortunately the head has been planed too much ,so the only option the owner felt he had was to get the bottom end rebuilt with the block surface machined flat. The engine had already been rebored to 87.5 mm ,the maximum so a good used block was sourced which had already been bored in the past to a 1st repair size. this allowed the block to be bored to 2nd repair size using the pistons from the other block. these are in like new condition . The conrods have been rebushed which is necessary on all of these six cylinder engines.
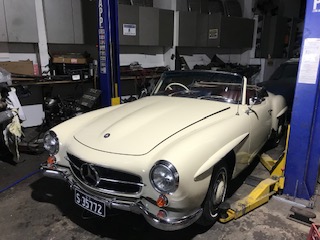
A nice 1959 190SL which the owner said was pulling badly to the right has come in for some work, but needed a full set of wheel cylinders to make safe.
a new pushrod for the pedal was made.
The Brakes weren’t releasing properly and the home made push rod was too long .a heavier version imitating an original ajustable push rod was fabricated. The device in the right picture is the fuel tank sender which had rusted up, along with a half a tank of very old fuel
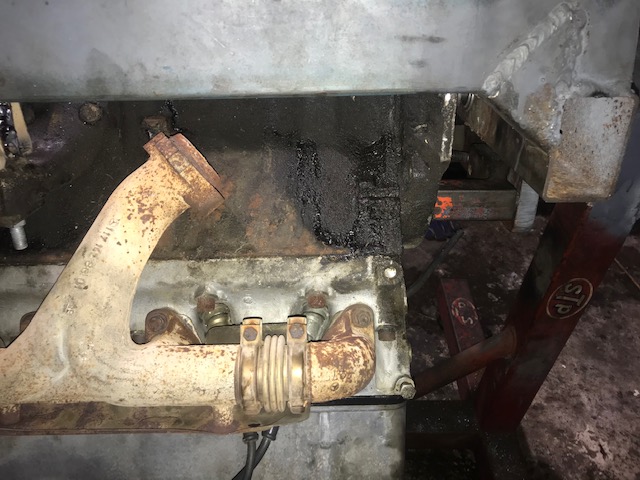
A bit difficult to see but there are spots on the exhaust manifold…it’s petrol dripping from the carbs. Not Good…..
An example of what i found in the brakes . This was the right rear hub, the small round thing is a push point on the brake shoes, there is supposed to be a forked rod pushing on this when the hand brake is applied. It was behind the shoe,so no hand brake. the larger round part is one of four self adjustors on the rear brakes. i had to strip those and rebuild them as the thrust washers were broken. Everything is working as it should now. Carb over haul is next.
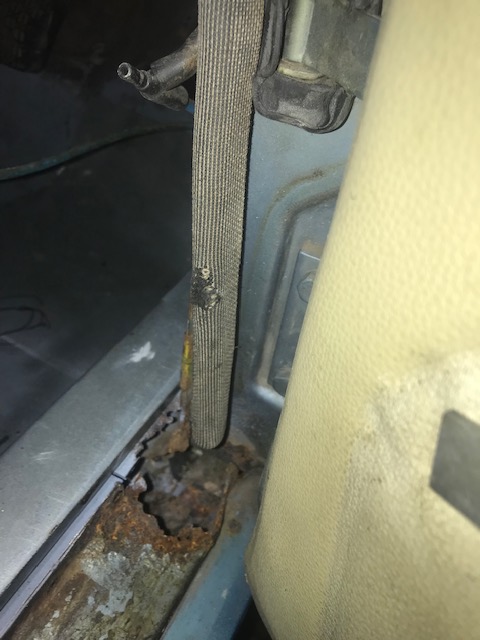
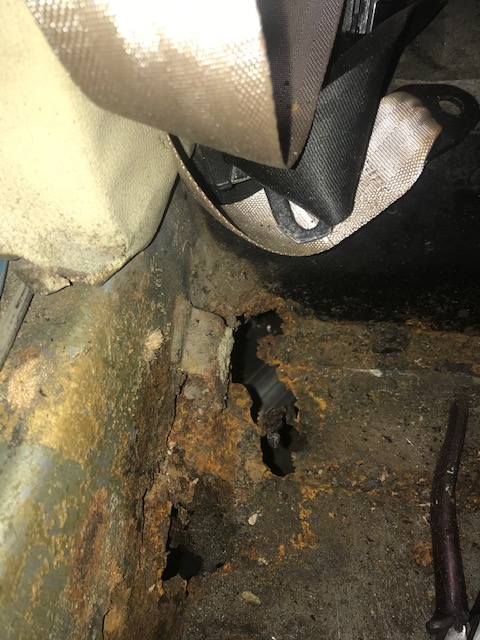
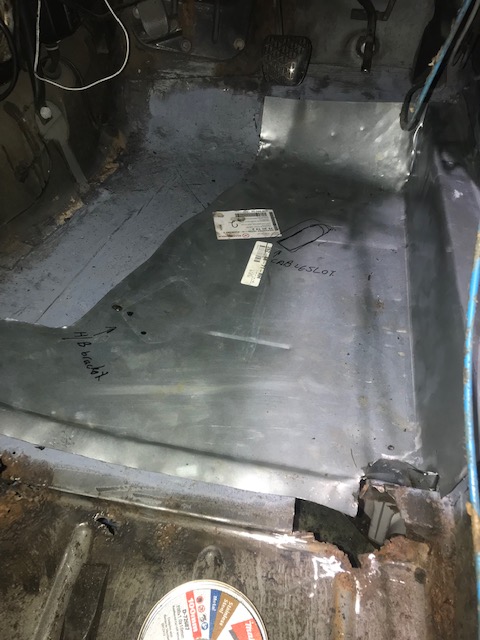
This is a 1973 W114 Coupe, a 280E which has had some horrific rust repairs in the past. The Owner has asked me to replace the rust damaged floors which will require me to cut out the old ones to be replaced with new ones.
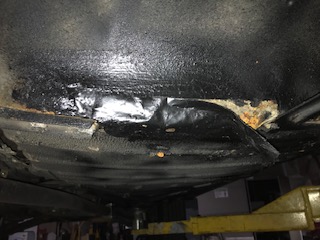
the pic on the left shows the type of repair, tape covered in black tar ,which has to be removed.
Center pic shows another mess covered in black stuff while the right hand pic from another car demonstrates what it is supposed to look like.
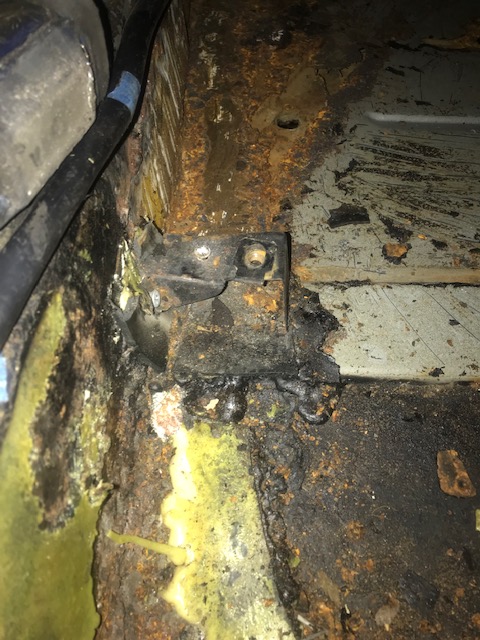
Rear Floor Next to hand brake mechanism , which shows a paper clip being used to hold the link pin in place.
Another part of the floor showing a rust hole full of expanding foam .
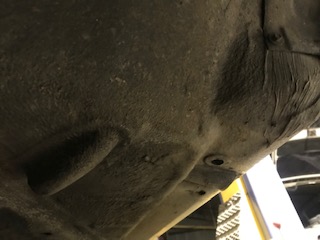
Another Veiw under anther W114 showing what the Drivers side floor and handbrake cable pocket should look like .Note the rust free jack point. on the Blue car this has rusted badly.
Left side jack point and what they are supposed to look like. right is NOT what we want.
This is what the left side rocker panel end and floor will look like when repairs are finished.
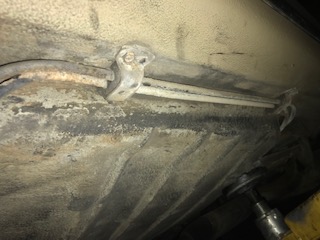
How the sills and floor should meet .this has largely disappeared on the blue car.
together in the shop.
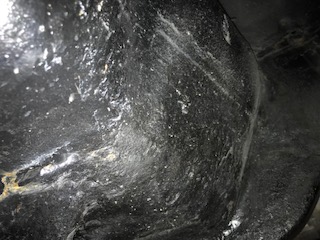
The Sad remains of the floor … Skilfully hidden by covering with bits of rubber, lots of Polyfilla and tar.
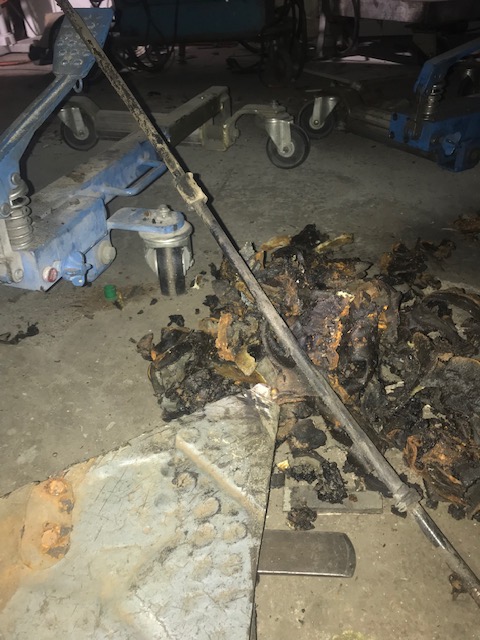
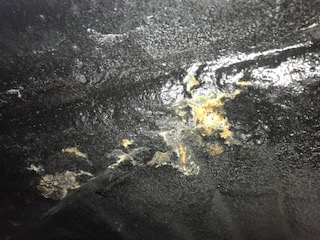
A sample of the debris removed from one floor section.
The battery has been leaking onto the passenger side (Left) inner fender and rusted out the floor. In this picture the rusty part of the footwell,next to the firewall has been removed.
This is the peice from a donor wreck used to replace the rusted part. As can be seen all of this has to be inserted to replaced the parts damaged by leaking battery acid.
This is the part that was removed, as can be seen it involved a lot of work with much panel damage covered up by previous repairers .
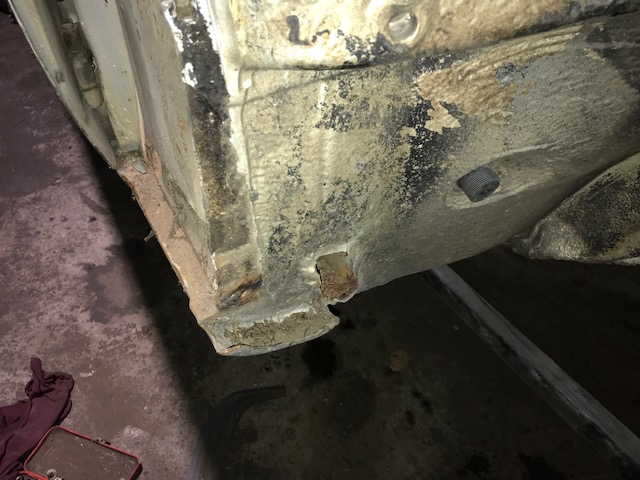
With the rusted part removed including the sill and jack point the damage doesn’t look so bad.
The replacement section in Place
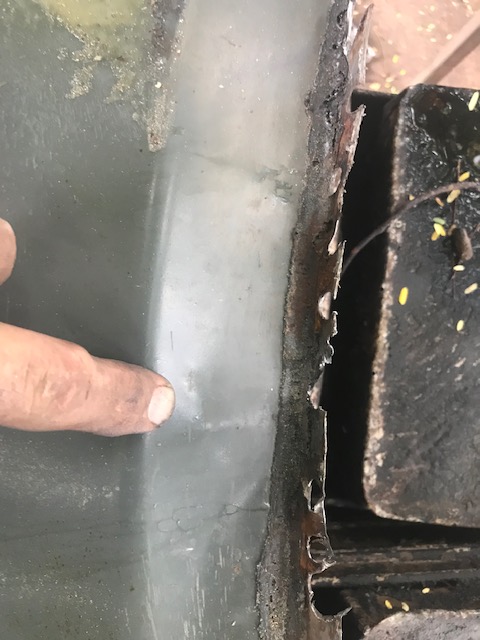
The Circle illustrates a gap,this was where a peice madein the same shape as the Sill Section but 1.5 mm smaller has been placed inside ,then used to weld the two parts together and add strength.
So the next part is to replace the right rear quarter . this had been “repaired” in the past but wasn’t the correct shape and was full of body filler . The spot welds have been drilled out ,’unpicked’ . The center peice below the rear screen has to be removed to fix rust,but that comes later.
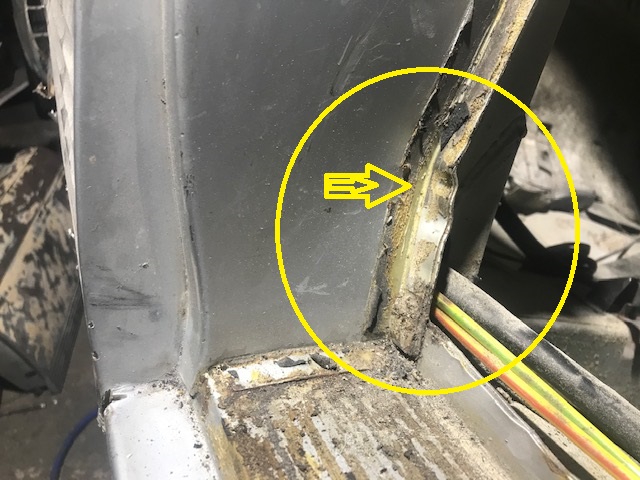
In this shot, the arrow points to a wrinkle in the B pillar where it’s been bent in the past in an accident . The outer skin has now been removed making this repair easier.
This is the right hand wheel house
The wheel house has damamge which has to be straightened before the new skin can be fitted .
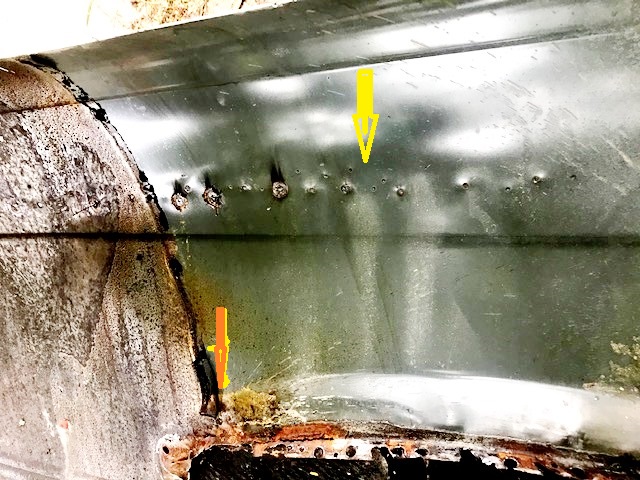
In this picture,it shows how the old skin was startng to rust on the inside because the window trim was leaking. Below, the area is indicated by the orange arrow .the yellow arrow indicates where holes were punched into the panel In the past, in an attempt to pull a dent out . this did more damage ,requiring the replacement of this part.
The wheel house has lots of dents made when the previous attempt at repair was made.
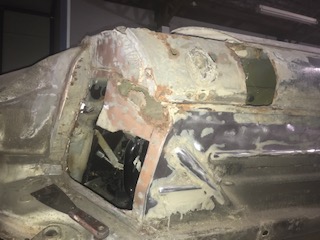
A customer has engaged us to rebuild his 1974 450SLC. This car has been rebuilt and maintained throughout it’s life including some time off the road in Storage. the paint is tired and flaking off so it will stripped back to bare metal,rust repaired and repainted before reassembly. it’s also rather special in that it will be four speed manual.
The car has been stripped to the bare shell in preparation for Stripping to bare steel .
The shell is very dusty after being in another shop for two weeks.
This is the right hand corner of the body, the body has little rust compared with others i have done over the years. that is a hole in the centre. Top right corner of the cowl reveals more holes,but this is the result of bad repair work in the past It is how water got into the cowl made the rust hole at the bottom.Another close uip of the right hand corner.Manual Flywheel for the 450SLC, plus clutch. it is a used item but in very good condition. it came from this engine, a M116 3.5 Djet engine which has had some work in the past and despite appearances, actually runs…and is for sale. Both Cylinder heads are stamped with a rebuilders mark and have over heat tell tale plugs fitted. Clutch and four speed trans as removed from the Donor car. Damper on the 450 Engine covered in residue from a leaking water pump. Suspected leaking head gaskets ,probably over heated because of the faulty water pump. More external oil leaks Engine is up side down in the engine stand ,oil leaking from rear of head. Oil seepage from left hand head.
This is the Sump for the 6.3 M100 Engine .On the right front corner. Oil was leaking through the weld and the side of the pan was full of cracks. All were leaking.
The welds were very porous and leaking badly.
The easiest way to fix all of the cracks and bad welding was to cut the bottom off and make a whole new bottom and weld it in place.
The Engine was rolled over to get the Sump off and to replace the crank seals . The crank shaft had to come out ,but bearing damage was revealed.
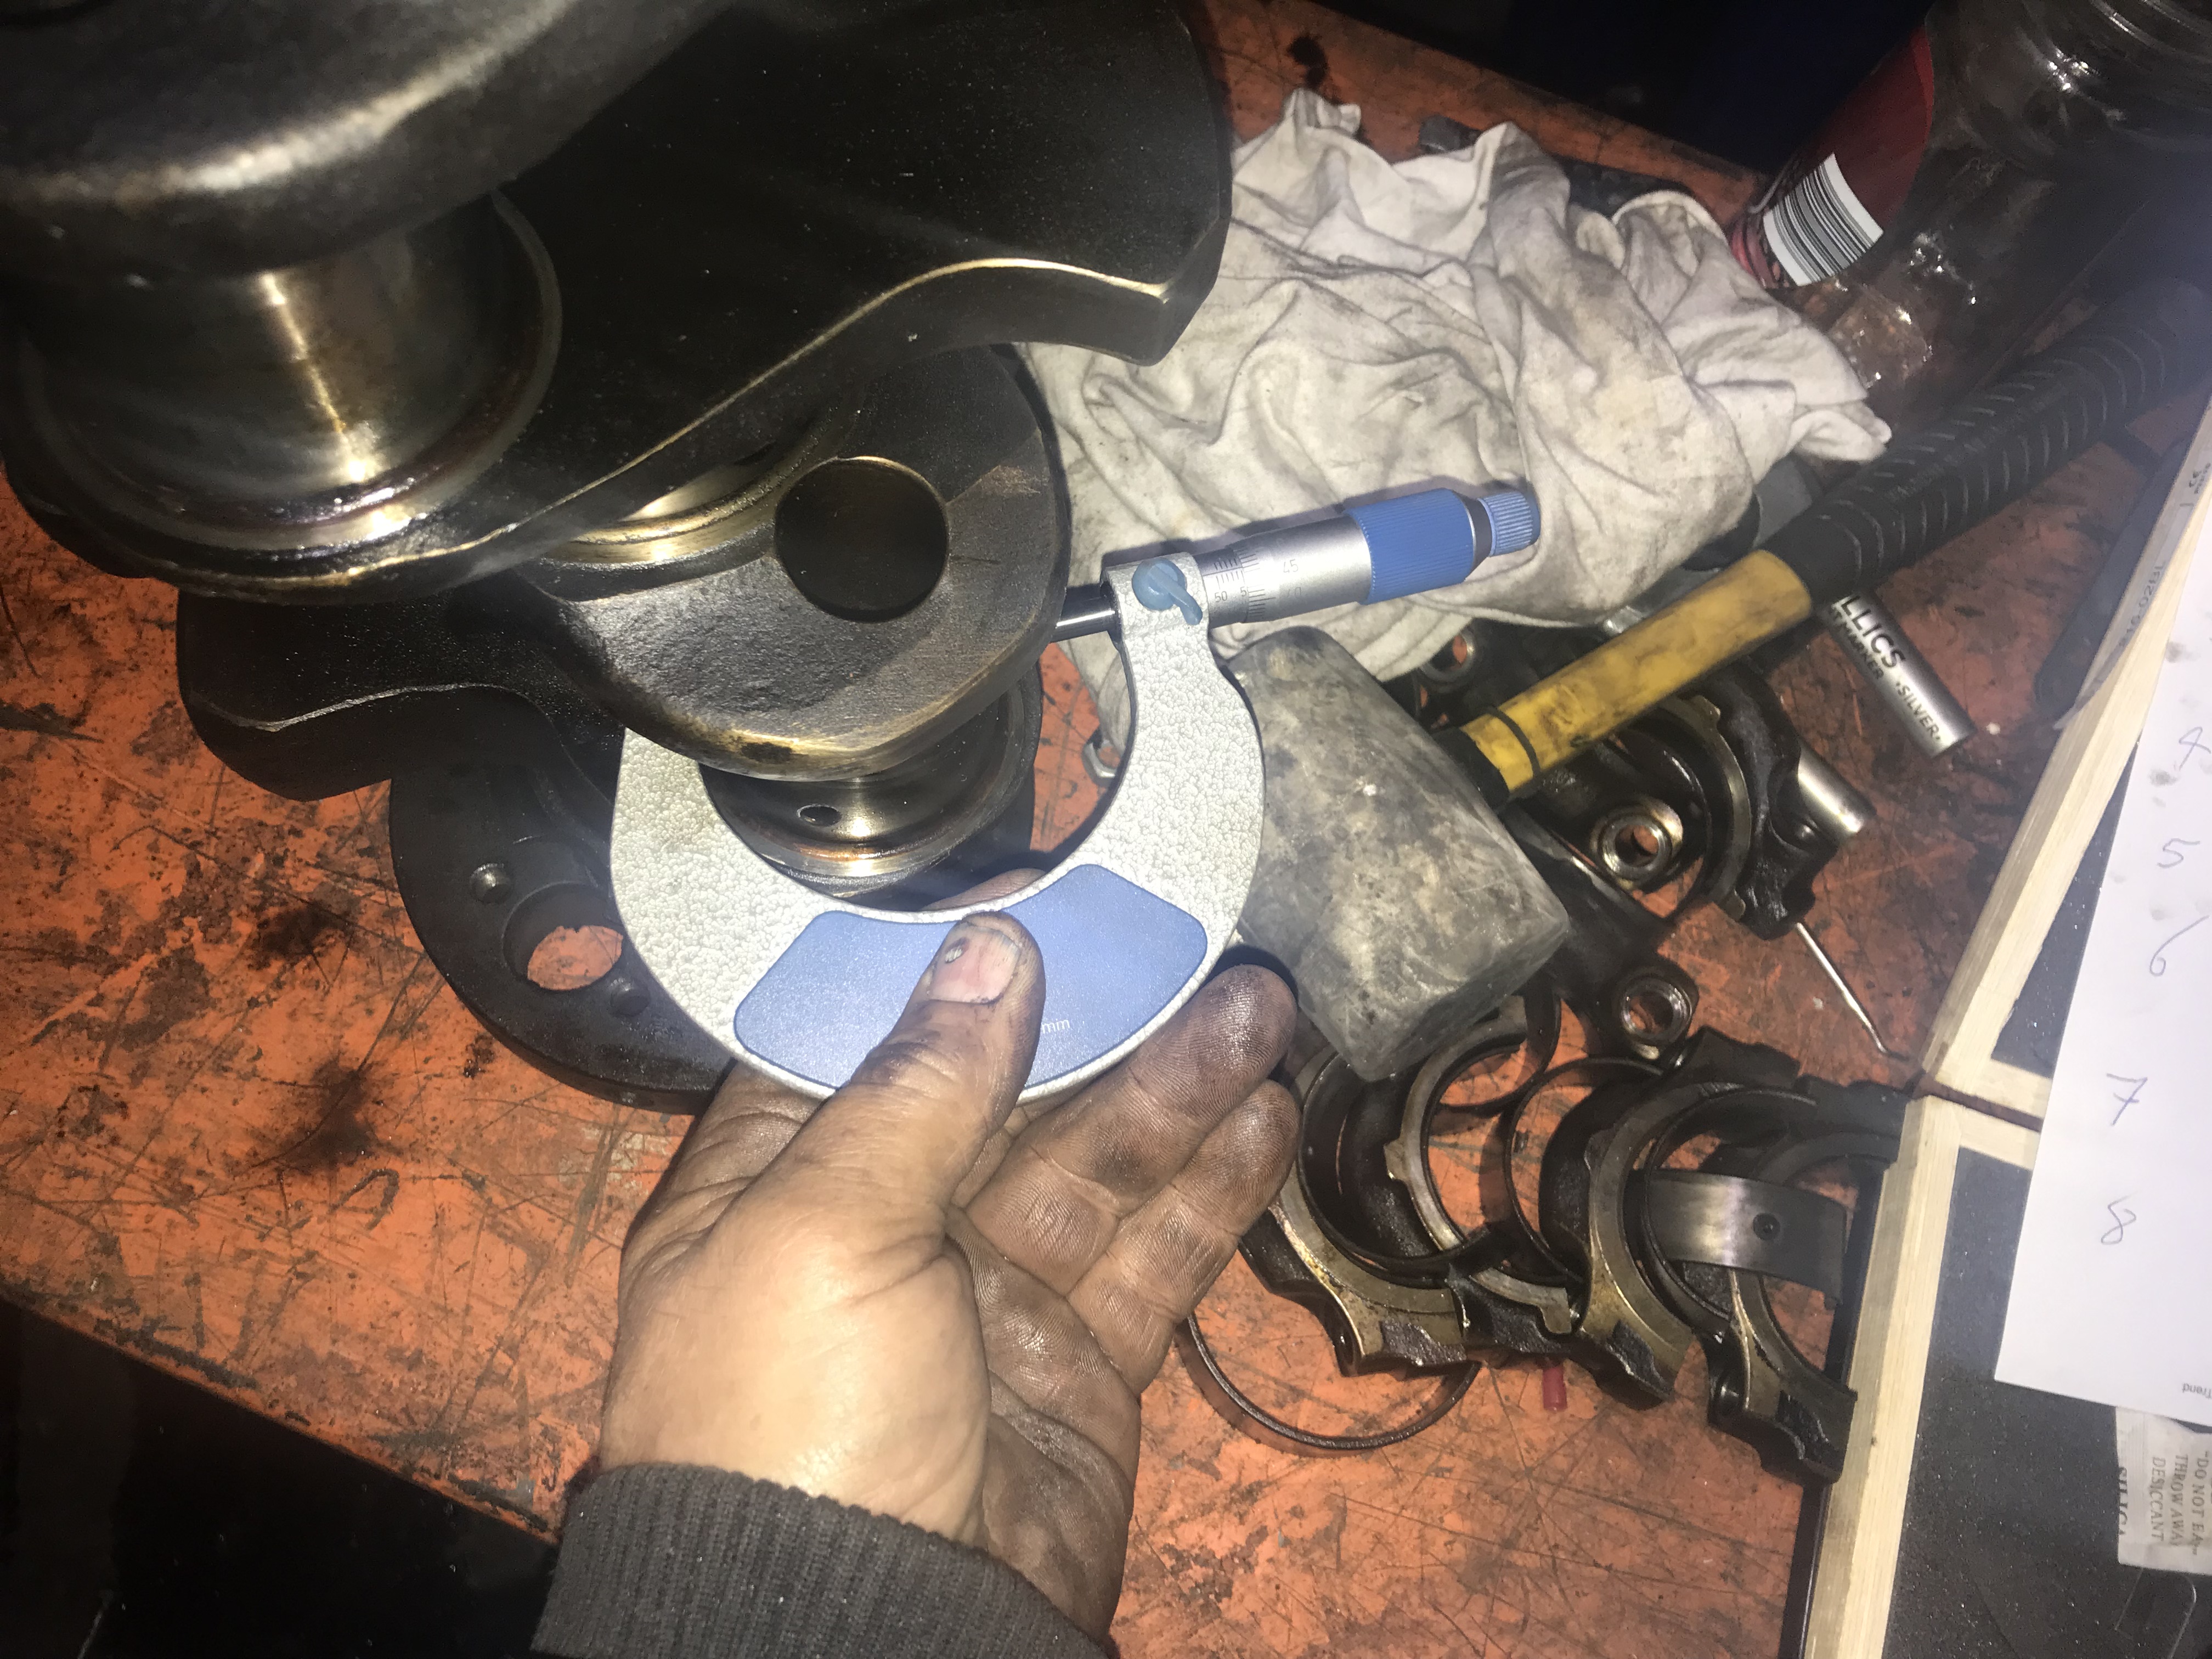
Number 7 Conrod bearing was flogged out and the conrod bore distorted . The Big end bore was resized.
Careful measuring of the crank revealed it to be free of any damage so will be cleaned and reinstalled.
The Bores are ok and only needed a light hone to restore the crosshatch pattern. The rings are worn and will be replaced.