Category Archives: Uncategorized

A day out

The Queensland Mercedes club has a clever idea, where owners who do their own maintenance or just interested in the workings of their cars get together every few months to chat .

It was a nice day so i took a customers car for a road test to diagnose an engine noise.

IMG_0140

3-0-0 B Adenauer .In almost original condition ,it has undergone a complete engine rebuild  .

Here are a few pics of the variety of cars which turned out.

IMG_0001 IMG_0002 IMG_0003 IMG_0004 IMG_0005 IMG_0006 IMG_0007 IMG_0008 IMG_0009 IMG_0010 IMG_0011 IMG_0012 IMG_0013 IMG_0014 IMG_0015

220SE coupe project update 28/2/15

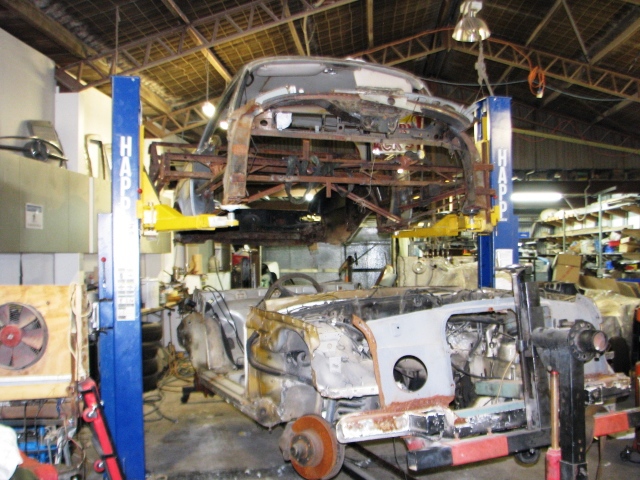
This thing has been going on for years. But today i lifted the body up and placed the chassis underneath so i can check for clearance ,fit and modifications that may be required .IMG_0144

The chassis is still mounted on the rotisserie where it has been for almost 3 years……

IMG_0145

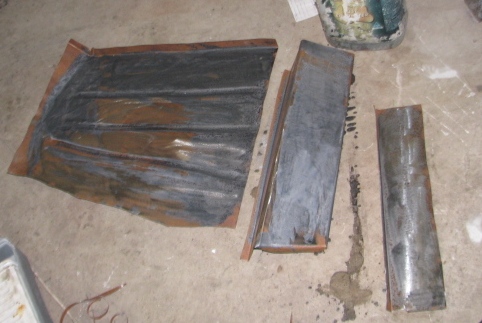
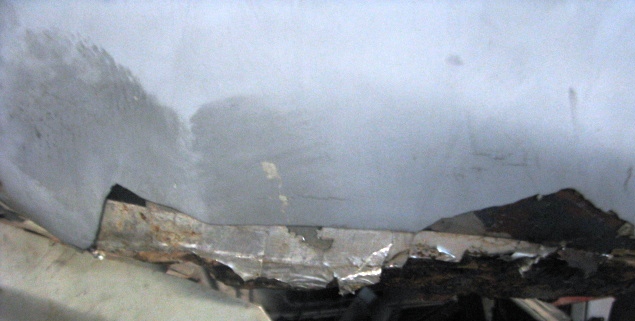
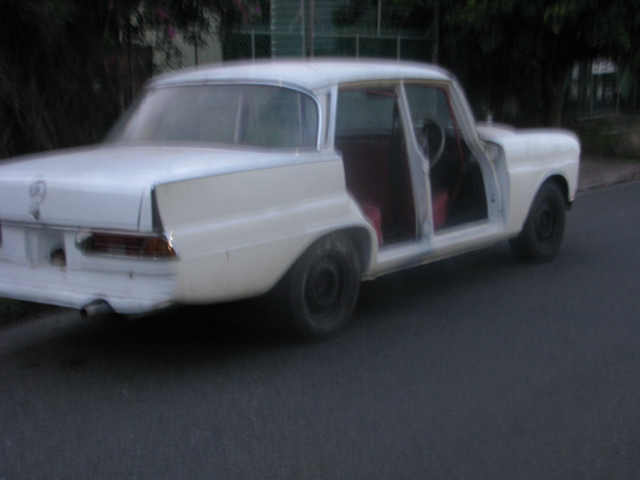
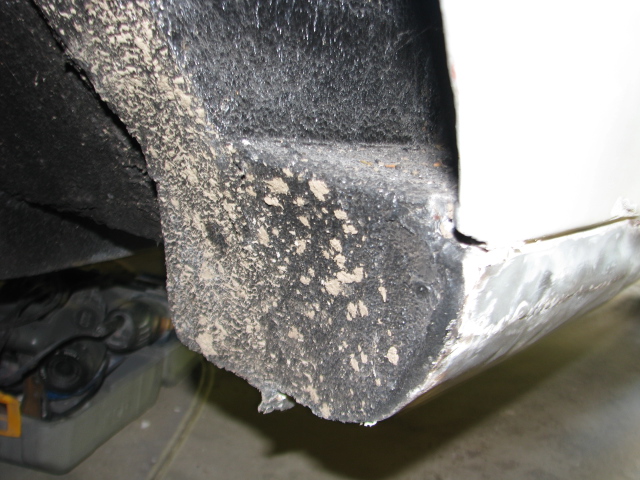
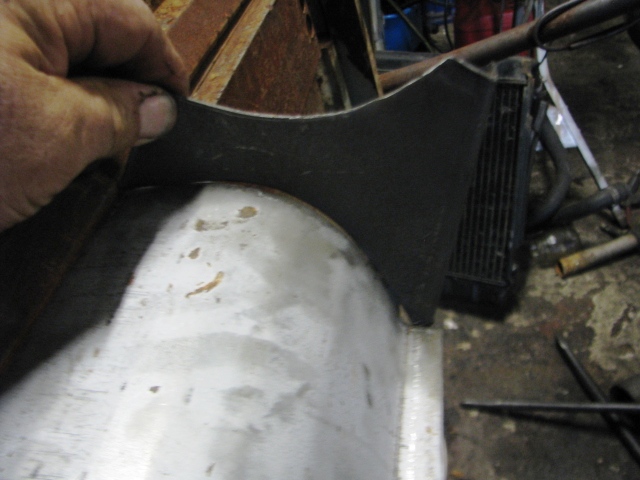
This is a close up of the left rear quarter panel bottom. An interesting use of silver foil and bog (bondo) to fill a rust patch. The inside isn’t rusted through but it looks as though i may need to make new panels to suit. IMG_0146

The patch can be seen here on the bottom. That primer was on the car when i bought it in Tennessee.

IMG_0148

Left rear needs a fair amount of work ,might be easier to weld in a new panel . IMG_0149N

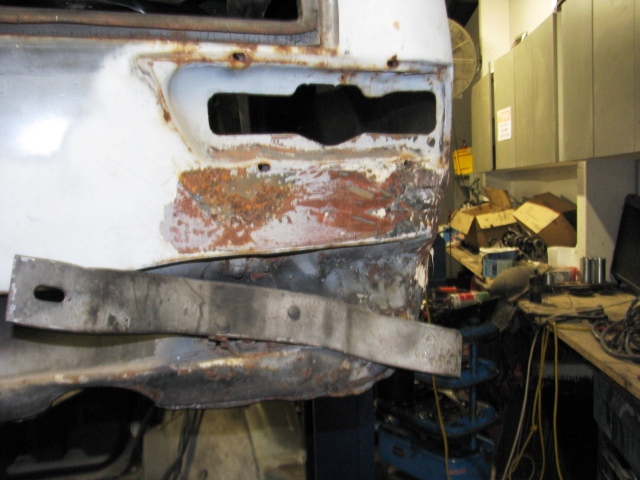
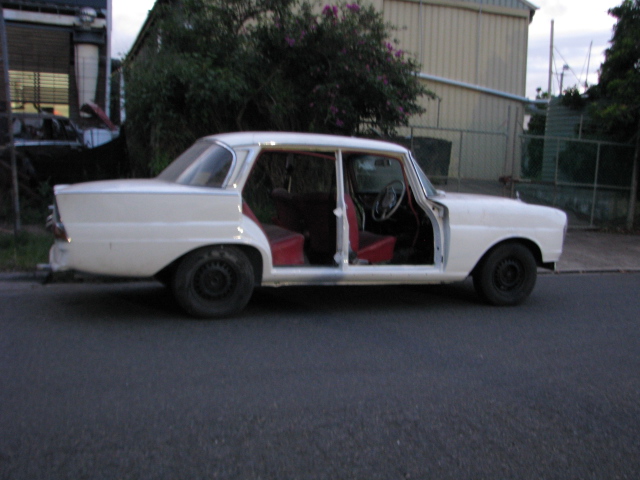
Not too much better this side with someone having bashed a dent out in past ….with a rock i think. IMG_0150

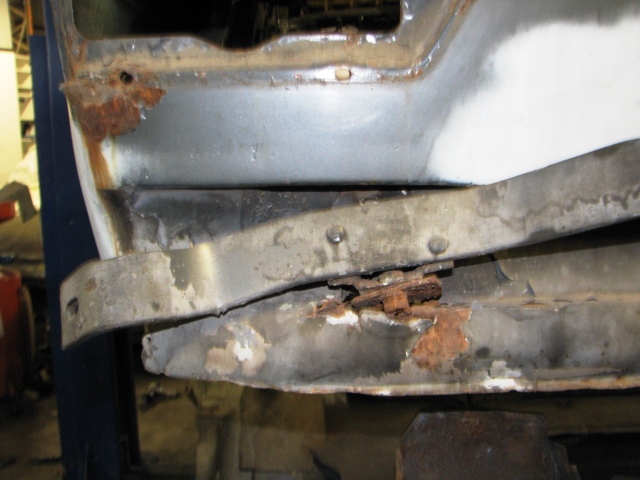
This is the right side panel ,normally there is a seam where the sill is joined to side panel . In this case the whole lot was brazed together then bogged over. i removed the sills and found they had been cut from another car..

.IMG_0151

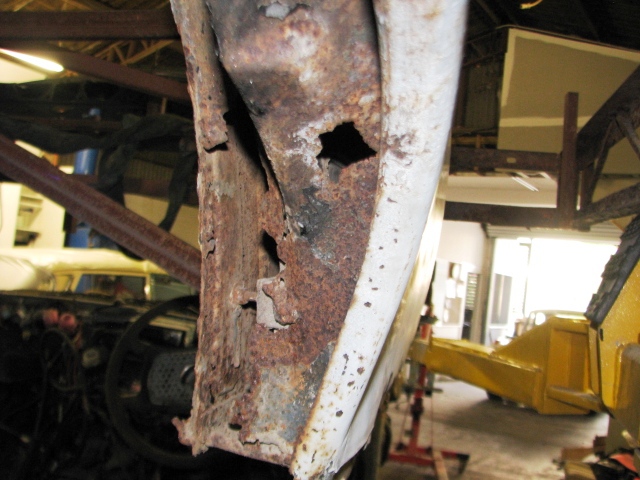
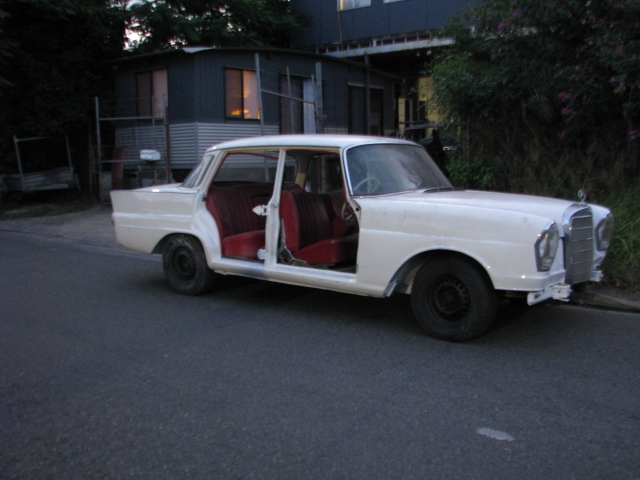
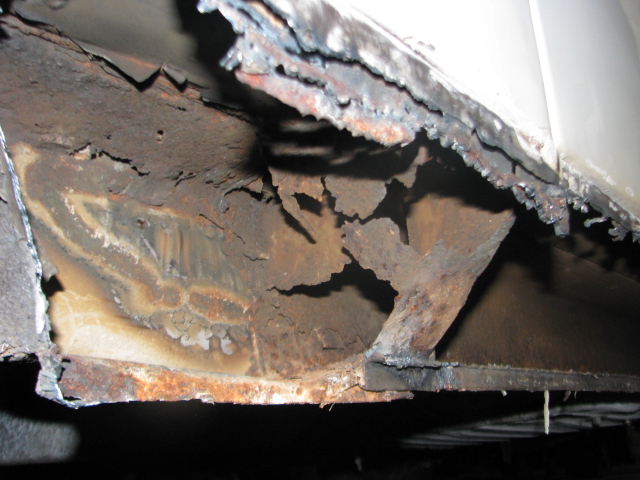
This is the front of the right hand rear wheel house .Not as rusty as the floors were but very close. This needs to be kept to maintain the strength of the body side. So…more repairs and new parts to be made.

IMG_0152

Left hand inner panel with part of the left wheel house . Not too bad either .IMG_0153

one last view before the hard stuff begins.

220SE nearly finished

Part of the paint work has been done ,it’s a daihatsu colour apparently and it’s VERY white.

IMG_0141 IMG_0142 IMG_0143

just need to fit the doors and it’s mobile again….

W110 Station Wagon Sold!.

i have been keeping this unusual Old mercedes for use as a shop hack, but i have basically run out of space. It started life in Victoria an Australian built 190C sedan. Sometime in the 1970’s someone converted it into a Station wagon and it remained in the Schnell Family as thier family car until 1992.

it was taken off the road around this time for an engine rebuild which was never finished. i bought it in 2010 as an unfinished project. I fitted a low mileage 240D engine and auomatic trans,W108 diff with 4 wheel disc brakes and a disc brake front end .The wheels are 15″ heavy duty rims .

IMG_0107 IMG_0114 IMG_0116 IMG_0117Over the years i have done so many little jobs on this car i have basically forgotten most of them. LOL!.

220SE chassis sections welded in

220SE rust repair 026

Left front chassis rail welded and seam sealed before undercoat and painting. In this shot the new jacking point can be seen clearly .With zinc rich paint and zincanneal metal,the jack oointd should last as long as the car now with no worries about them rusting out in future.

220SE rust repair 027 220SE rust repair 028

Right Front Chassis and drivers side floor welded in a seam sealed …These will never rust again!

Parting Out M129 250SE engine.

I am parting out a M129 engine. Block and crankshaft are beyond repair but it was a running engine (didn’t run too well though…) Cylinder head etc seems to be OK. Email me with any requests for parts.

220SE rust repair 029

Mercedes W110 project For sale SOLD

https://picasaweb.google.com/116046874571116258862/W110Wagon03?authuser=0&feat=directlink i have run out of space so this car has to go. Best offer gets it.

Off to Adelaide ,South Australia soon…

220SE rust repair 025

220SE More rust uncovered.

deans W111 2015 027

today,Australia Day ,was spent cutting the passenger side sill cover off. It was pretty rough on the outside but under neath it was even worse . Two layers of rusty metal covered in a thick layer of filler…all very ugly The above pic shows what was under the filler, pataches welded and pop riveted into place..

deans W111 2015 034

Front of the sill covered in pataches, silicone bathroom calking and black bituminous under seal. All guaranteed to look ugly and dodgy. Note: No jack point…or even a hole for one!!!

ebayjan2015 055

Cutting open the pathes with the plasma cutter was slow because of all the layers of rust hidden underneath.

ebayjan2015 051

The inside of the sill revealed it to be the outside of another panel from another car. Someone had cut a curved piece from a wreck and stuck it over the rust

ebayjan2015 056

Above is picture taken from ground level pointing upwards. As can be seen the bottom of the A pillar has dissapeared completely along with jack point . On the left of the pic is another patech welded over rust but on the inside of the chassis rail. This has been removed and new chassis rail section made to replace the missing section of chassis.


Below, the double layers of metal 1/2 way through removal.


ebayjan2015 054

Below, this is remants of the front of the chassis after the patches on the floor were removed.

ebayjan2015 052


220SE rust repair, New sill panels

To celebrate the purchase of a new piece of equipment , 2.5 meter folding break, i got stuck in and made the two new outer sill panels. The originals are a mess of bashed in a rusted patches and have weakened the cars structure. The new onwes are made from 1.5mm Zincanneal steel and will last another 50 years without problems.

ebayjan2015 040

This ugly Monster is pretty big at 2 tons . The Drivers side sill is pictured clamped into the break . To give an indication of the size,the sill is 2 meters long .

ebayjan2015 045

This is my Temkplate for the section. From front to rear,the panel isn’t parrallel , it has a different profile from Front to rear . The right hand side of the template shown,is the rear of the sill panel and the left is the front.

ebayjan2015 041

Front profile.

ebayjan2015 042

Rear profile.

After this car is done I’ll have to paint the break….ha ha .

220SE rust repair continued

220SE rust repair 021
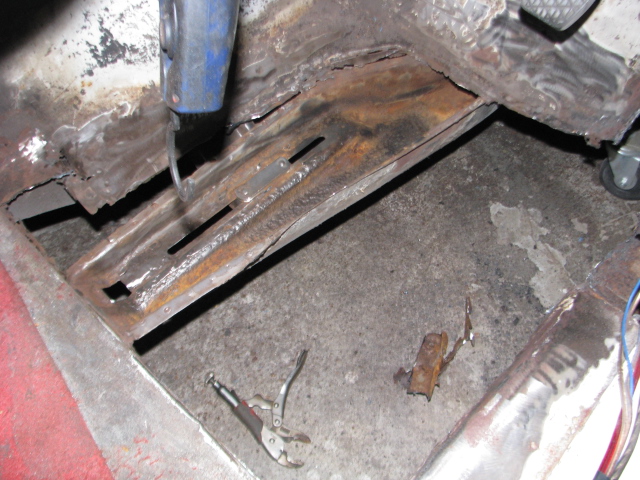
Inside the chassis rail

there is a cover which prevents the ingress of road dirt and water through the slot for the trans cross member bolts. this one had rusted right away and the rust was starting to eat away the inside of the chassis rail

220SE rust repair 020
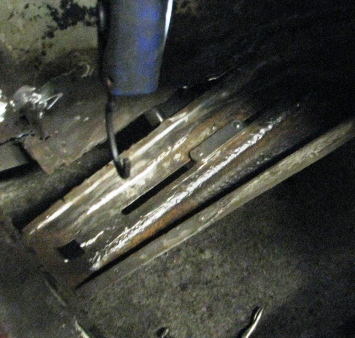
Cleaned up with a wire buff

….then treated with phos acid to convert the remaining rust.

..220SE rust repair 022
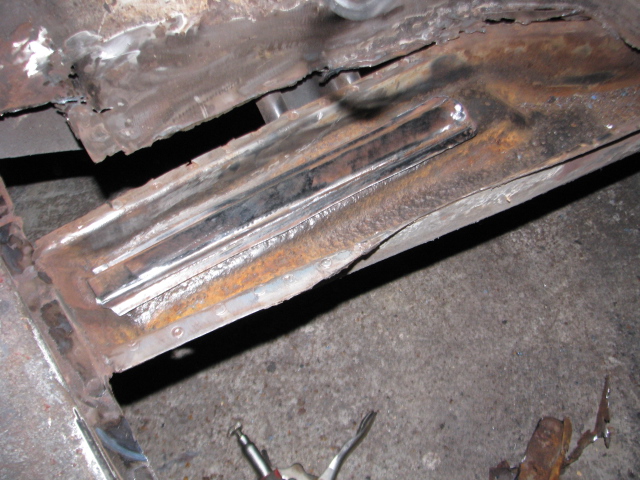
New cover made and welded in place

this will be painted with a Zinc rich paint and wax treated to prevent rust coming back.


220SE rust repair 023 220SE rust repair 024

New floor,outer sill/chassis rail and seatr box panels roughed out to be welded into place when the new jack points are made . The jack points are welded into the sill box sections